
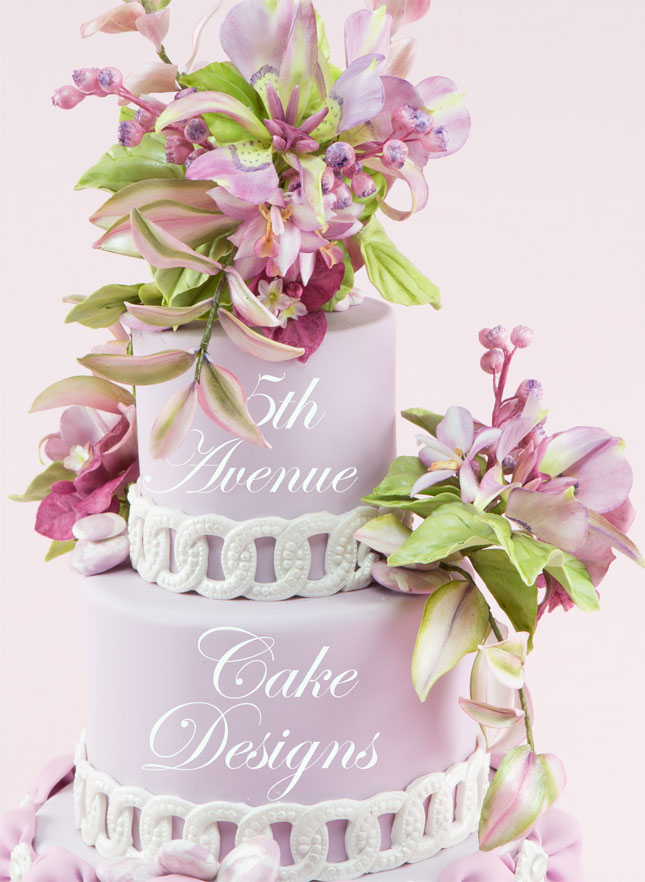
They look so real
Every once in a while someone or something will become a part of your life that shapes your views or changes you. I have been blessed by such an experience; both Kerry Vincent and Toba Garrett have entered my cake decorating life. I am in awe of their capabilities and genuine talent, if you have not had the opportunity to see either women’s amazing cakes please go to the links I have provided below.
I recently received Kerry Vincent’s Romantic Wedding Cakes, a must for any inspiring or accomplished cake designer, the book contains pages of stunning cakes with detailed instruction to delight the reader. I also added to my culinary cake library, Toba Garett’s Professional Cake Decorating, 2nd Edition, I think I own all of her decorating books, her knowledge and technical artistry is awe-inspiring!

Just a few tools of the trade
So it is no surprise Sydney and I have creating gum paste flowers. I wanted to share our technique for designing gum paste/sugar paste roses.
Gum Paste Recipe:
- 625 grams/ 5 1/4-cup icing sugar, 10 3/8-cup
- 30 grams/ 3-Tablespoons gum tragacanth
- 30 grams/1 egg white, room tempature
- 850 grams/3/8 cup water
- 30 grams/ 2-Tablespoons glucose
- 125 gram/ 1-cup icing sugar
- Plastic Film
Prepare your mise en place.
In a bowl of a standing mixer sift the icing sugar, add the gum tragacanth, and whisk till combined. Add the egg white mix for 1-minute on medium speed, add the water and glucose mixing until amalgamated.
Transfer the paste to a counter top or work space, knead the remaining icing sugar (by 1/4 of cup at a time). Keep add the icing sugar until a smooth, firm dough develops.
Coat a large piece of plastic film with shortening, roll the paste into a cylinder shape, wrap tightly, store in an airtight container, and allow to rest overnight.
There are a plethora of good gum pastes available for purchase if you would rather skip preparing your own.
To began preparing Open Roses:
- Rose leaf cutter
- Calyx cutter
- Flower foam pad
- Leaf cutters
- Ball tool
- Fondant rolling pin
- Rolling mat
- plastic teaspoons
- Flute and Vein tool
- wooden toothpicks
- 2 large plastic sandwich bags, prepared
- Cell Forms
- Gum paste
- Food color paste, of your choice
- Shortening
- Small paint brush
- small brush for attaching
- petal dust
- Edible glue or egg whites
Apply a small amount of shortening to the tip of a toothpick. Shape a small amount of kneaded gum paste into a center cone, this will be the inner bud of the rose, allow to dry overnight for best results.
Prepare your mise place, and sandwich bags.

Mise en place of tools
To prepare sandwich bags cut the top and both sides, apply shorting to the inside liners, this is for cut petals, to keep them from drying out.
Color your gum paste (make sure to wear gloves the color will stain), knead, and roll out.

A fondant roller is a must, due to the smoothness
Roll the gum paste 1 mm thick.

Roll gum paste just like any dough
Each rose will need a total of twenty petals, working with five at time. We prefer to cut 10 petals at a time. Placing the petals in the sandwich bag till needed.

The petals
On a flower foam pad place one petal (there are two because Sydney and I each were working together), using either a bone tool or a ball tool begin to frill the edges, by rolling the petals edges gently with the ball tool. Place the petal in your palm gently roll the ball tool from the center out.

The edges will begin to frill right before your eyes
The first five petals will be wrapped (attached with either edible glue or egg white) around the center cone/ the bud. Wilton’s cake gives a great descriptions on the first five petals. Think of the petals as a head, two arms, and two legs. Attach the head first the petal should encompass the tip of the bud, using a soft small brush wet the center cone with edible glue, now attach one arm and one opposite leg, repeat for the next two petals. Starting the petals half way up from the cone.

Try not to wrap too tightly, leaving an opening at the top
The next fifteen petal will be frilled in the same manor except laid on a plastic spoon to set, and dusted with petal dust. We chose a shimming lavender, but a bright pink would have been beautiful as well.

I like to place the petal so it lays a little on the side, to create a nice bend
Once all the petals have been laid on spoons, begin to build your rose on a Celform from the outside in. Most Celforms have a small hole in the middle, if yours does not push a large pin through it to create a hole. Begin with the first five set of spoons, lay the shaped petals around the Celform over lapping the petals sightly. Remember to brush each petal with edible glue or egg white, to adhere to each other. Lay the next five in-between where the first five petals attached, slightly higher. Repeat with the third and last set of five petals following the same pattern, each set of five petals should be tighter and look higher. Once all fifteen petals have been arranged poke the toothpick center/ bud through the petals and Celform hole, place the Celform, with the tooth pick still attached in a small glass. So the lips of the Celform cover the top of the glass (we used shot glasses). Let dry overnight.

Rose drying on a shot glass
The next day prepare your leaves and calyx.

Leaf/Calyx mise en place
Roll the colored gum paste out to 1mm, cut at least 3 leaves per rose and 1 calyx using a leaf and calyx cutters. Frill the calyx and leaves from the center out, taking care to frill the edges, be careful to not tear the gum paste. Keep the leaves and calyxes in your prepared sandwich bag until use.

Flute and veiner tool in the back, bone tool in the front
Each leaf and calyx is colored with green, yellow and gold petal dust to achieve the color of the leaves

Lay the leaves over a Celform or a rolling pin
Using edible glue or egg whites attach the calyx to the bottom of the rose, allowing the calyx to bend a little away from the rose. Attach the leaves with edible glue or egg whites. These roses were prepared for a special cake… we attached them and surprise, surprise allowed the roses to dry on the covered cake overnight!

The tutorial for this cutie will be given later in the week.
Remember to be patient and take your time. Footnote: these flowers become addicting, Sydney and I can not stop making them. I am truly elated both Kerry Vicent and Toba Garret have become apart of my world.

Voila!!


So gorgeous Bobbie!
Rose thank you.
These are so gorgeous….truly the work of art. Thanks for the detail instruction on how to make these beautiful gum paste roses. You make it looks so easy. But I’m so NOT a crafty person and I just know I won’t be able to make them as beautiful as yours. Both Kerry Vincent and Toba Garrett are so talented and I admire their work as well. 🙂 Thank you for sharing. Have a wonderful evening.
My pleasure and thank you!
like the idea of drying it in spoons
lovely post nice to meet you
Thank you; the credit goes to Kerry Vicent and her wonderful book!
wonderful roses, bobbie! real art and impressive work.
all the best, codruta
Thank you
beautiful thanks for sharing
Your roses are lovely and so real
So pretty thank you for sharing.I learned a lot!
I am glad the article helped you!
You’re too “sweet”
Hello! Super great information. Keep it going!
Thank you, there is more to come!