
Boo cupcakes, even the ghost is edible!
Halloween is as entertaining for adult as it is for children; Sydney and I are no exception. We become completely engaged in decorating, dressing-up, and baking treats to give to family and friends. These amusing cat, bat, pumpkin and ghost cupcakes are just one of many mouthwatering goodies we are packaging to hand out. With just a few materials and imagination an ordinary cupcake becomes a boolicously, unique Halloween pastry, that is irresistible to all.
Sydney and I baked an extra batch for the preschoolers she is observing for her development class. The kids frosted, with help, and decorated their own cupcakes. Sydney explained with exhilaration how each child with excitement began to use the molds and colors to decorate their special cupcake; they then proudly displayed their work! As I listened to Sydney’s wonderful experience, it dawned upon me what a brilliant family holiday activity the Halloween cupcakes would be!
Bat, Cat, Ghost & Pumpkin Decorations:

Trick or treat fun, especially when the treats are in arm reach!
- 1-recipe vanilla cupcakes
- 1-recipe buttercream icing
- Bat, Cat, Pumpkin Mold (Sk product)
- Ghost mold
- Med Celpin
- Forest green petal dust
- Orange petal dust
- Pearl dust
- Yellow sparkles piping gel (SK)
- White fondant
- Orange colored fondant
- Black colored fondant
- Cornstarch
- A-ceto knife
- Fondant mat
- Artist brushes
- Toothpicks
- Gum tragacanth
- Open or closed star tip/tube
- Pastry bag
- 18 gauge wire, optional
Prepare your mise en place.

Mise en place
and

Ghost Mold
Prepare the fondant with some gum tragacanth, about one teaspoon per 12 ounces, for the black and orange colored fondant, color the white fondant prior to adding the gum tragacanth.
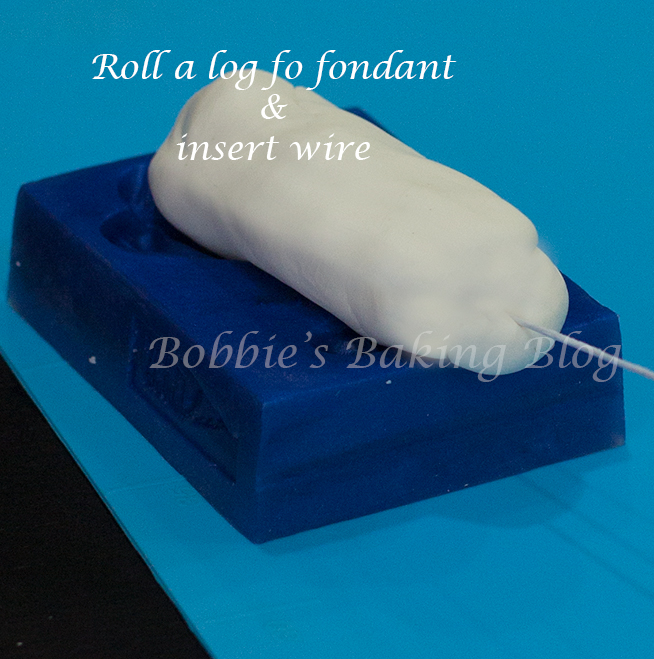
We started with the ghost, due to the longer drying time. Roll a log of white fondant the size of the mold, if you want to us a wire, 18 gauge works best dipped in an egg white, and carefully inserted to the middle of the long.
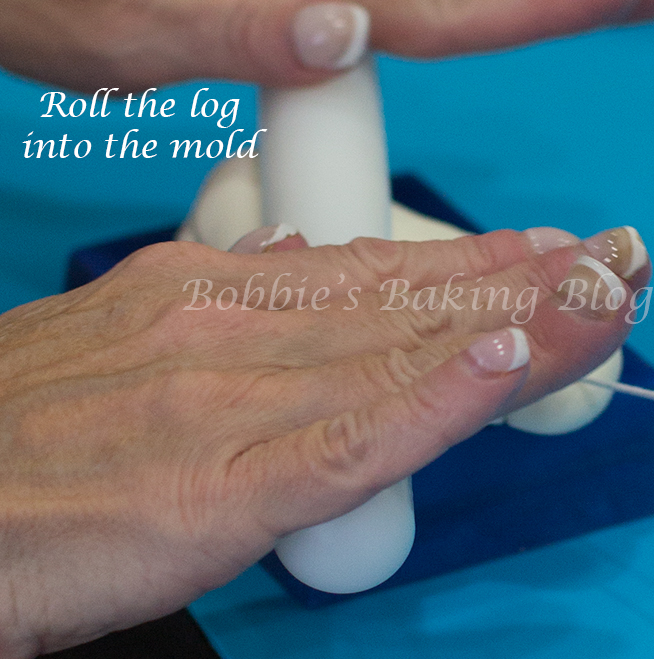
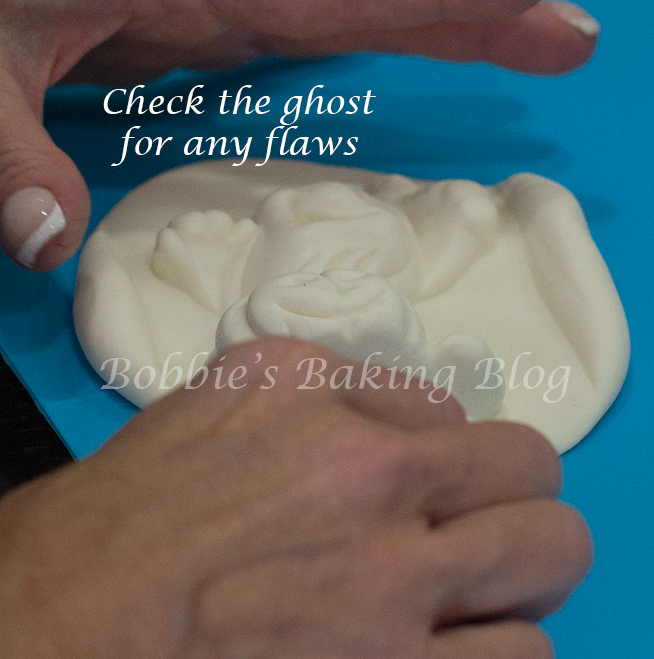
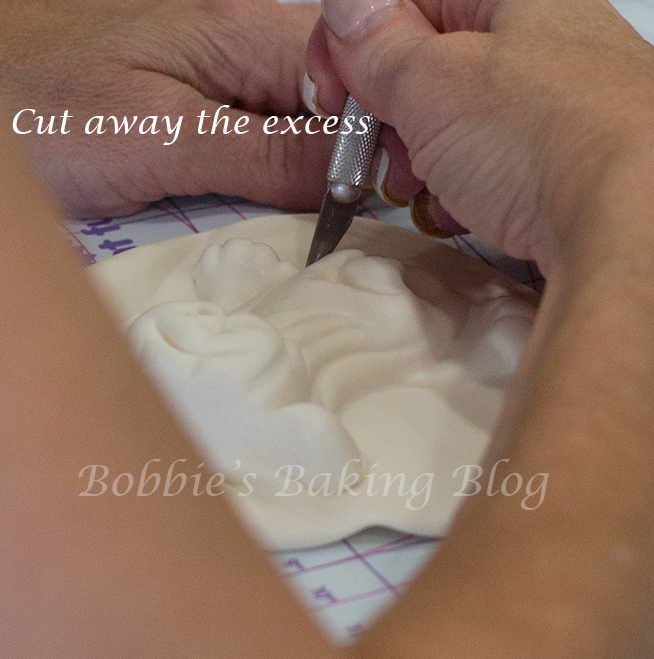
Using a medium celpin or your small fondant rolling pin roll the log, after placing the log on the ghost mold, use the back of the pin to indent the fondant log into the mold. Turn the mold upside down and gently release the ghost. Cut around the ghost figure and allow to dry overnight.
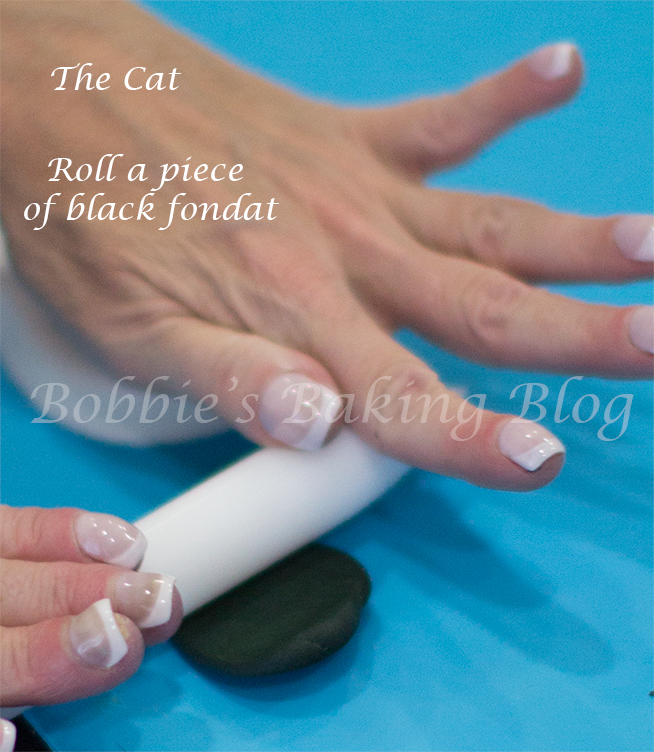
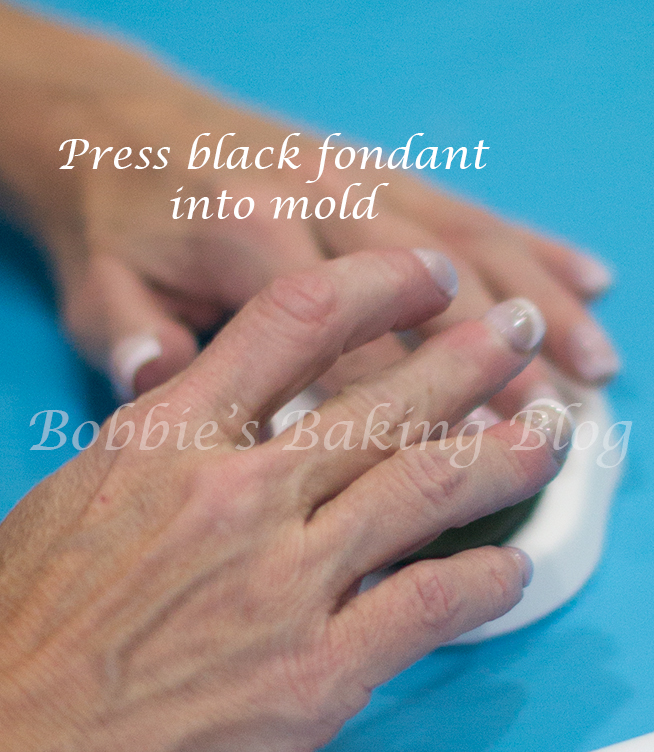
For the bat, cat and pumpkin there are two techniques and both works fine. I prefer the one shown for the cat and Sydney prefers the technique shown for the bat.
First technique:
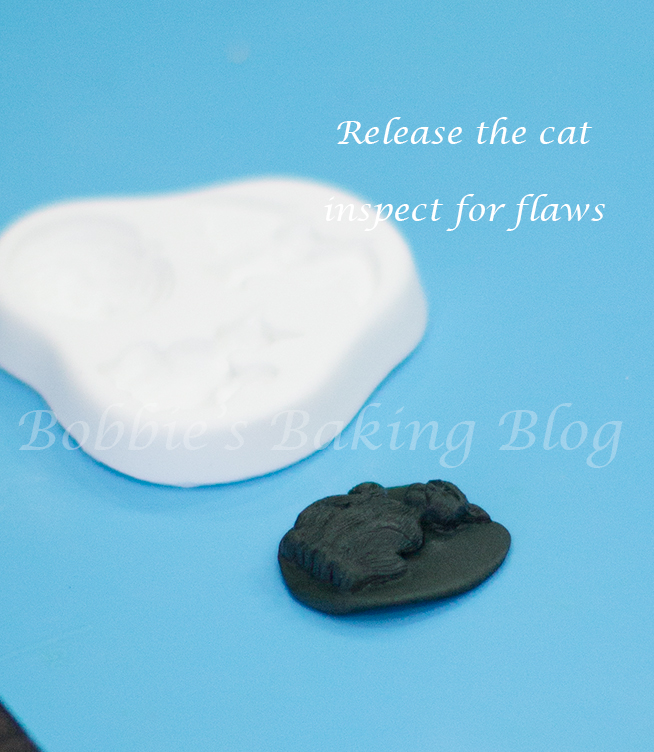
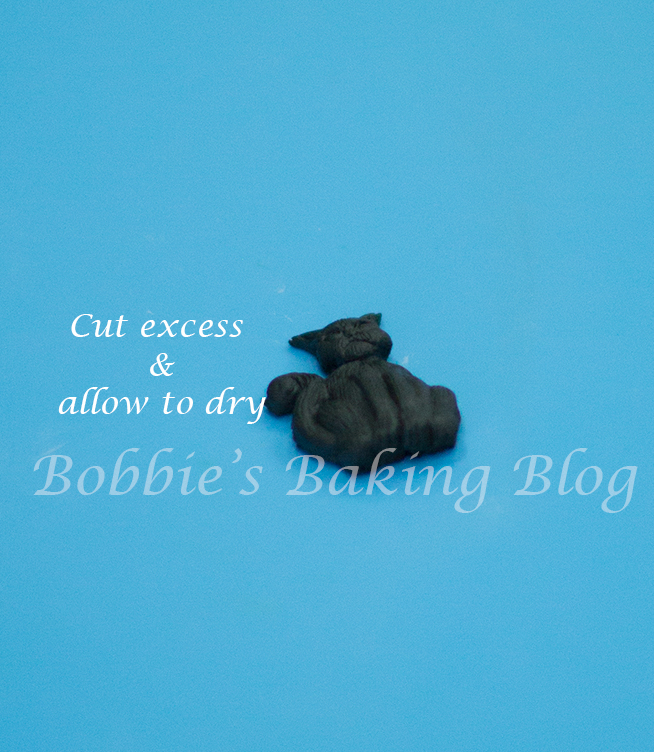
Knead a piece of black fondant, roll a disk the size of the cat mold, using either the round end of the celpin or your finger tips push the black fondant into the mold. To release the cat figure from the mold, gingerly lift the cat out from the mold. The mold is flexible, so slightly bend a corner and use your a-ceto knife to cut the cat out. Allow the mold to dry overnight.

This black cat may cross my mouth!
Second technique:
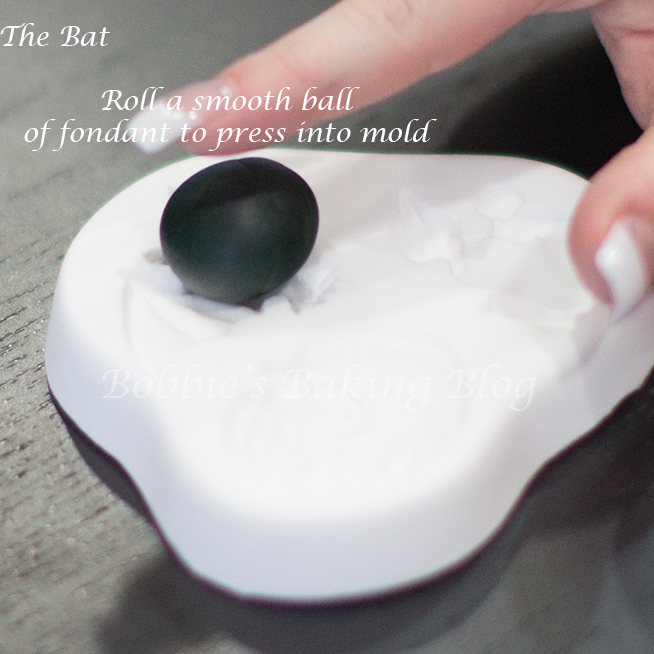
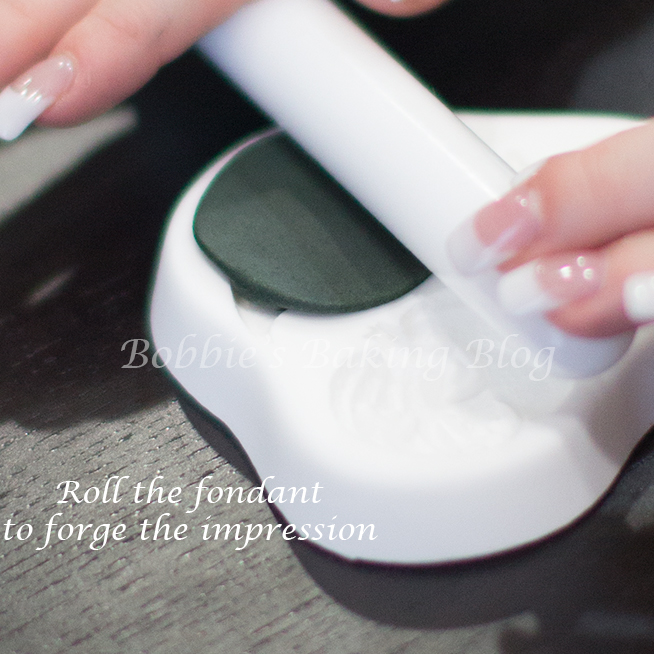
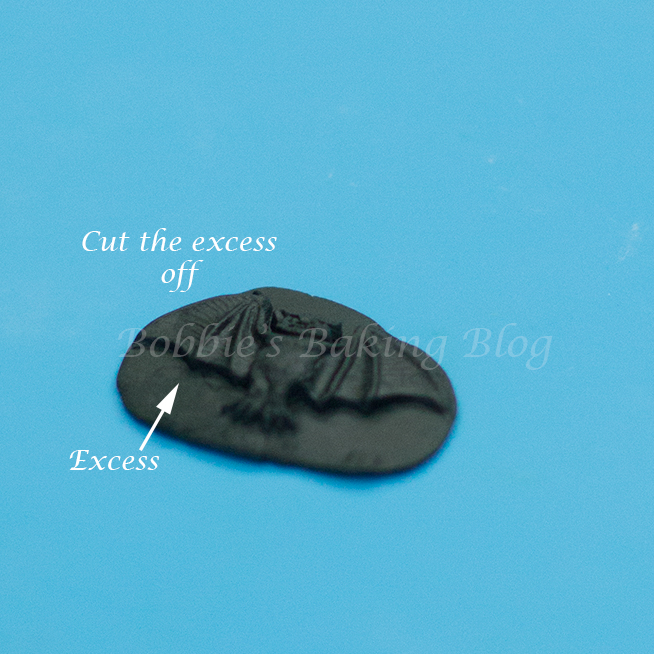
Knead the black fondant, roll the black fondant into a ball about the size of the bat mold, press the ball into the mold, and roll over the fondant with your celpin. Release the mold by turning the mold upside down and slightly bending. For the pumpkin choose either method, but use the orange fondant. Allow the bats, cats, and pumpkins to dry overnight.
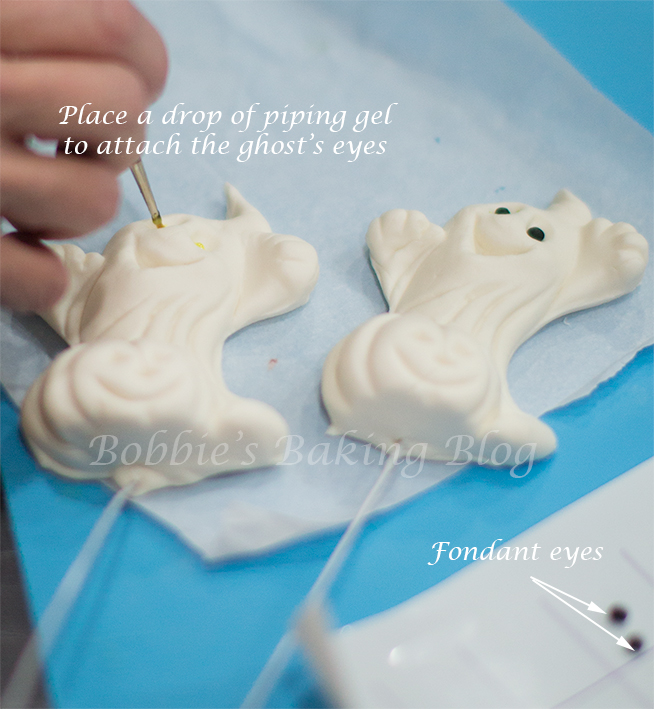
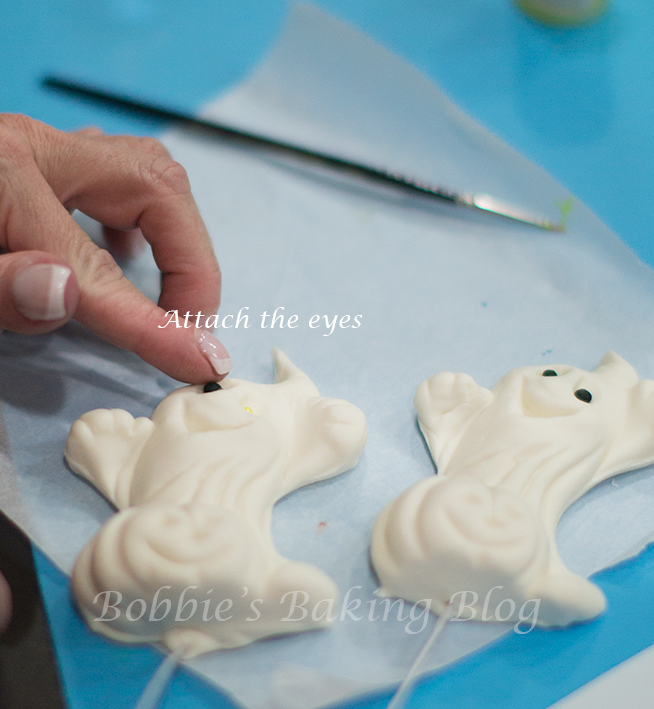
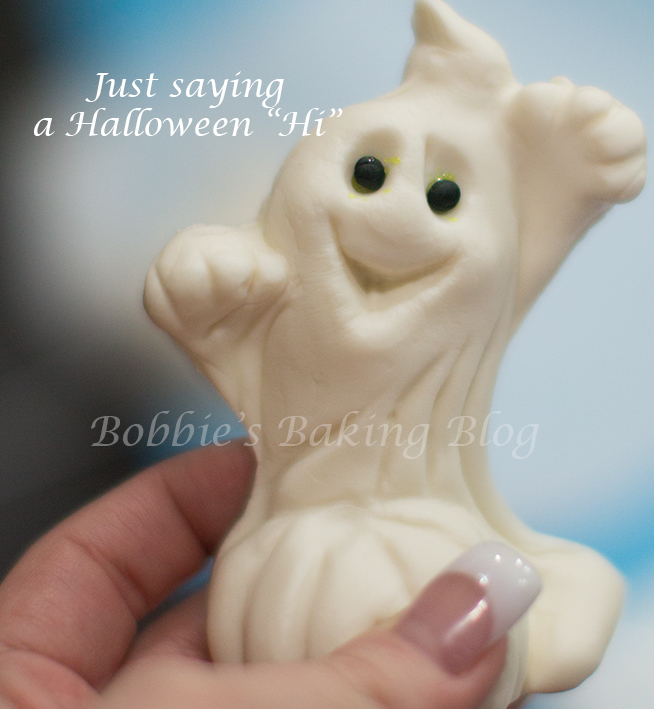
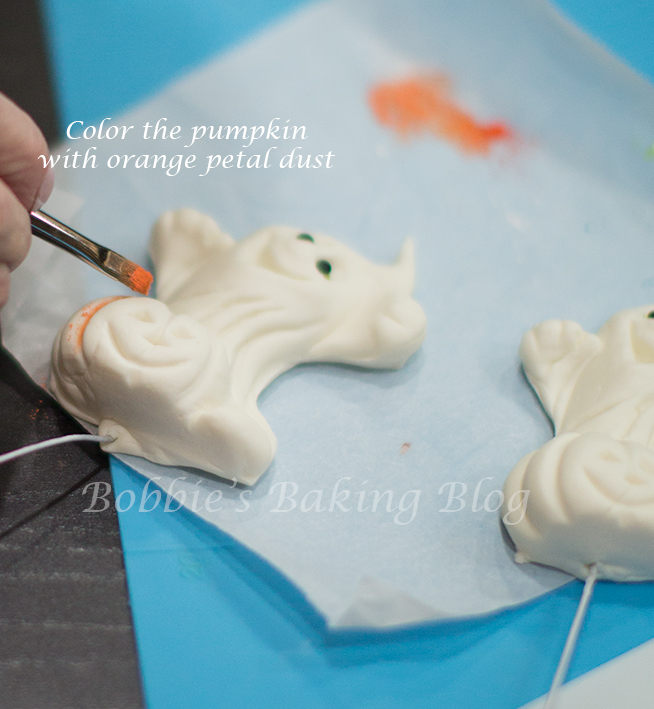
Decorating time! For the eyes we used sparkles yellow piping gel for all the figures, with the ghost we added black eye balls to the gel. Roll 2 eyes per ghost equal in size, attach, using either your forefinger and thumb or tweezers to the yellow sparkles gel, and allow to dry. To color the ghost and pumpkins mix orange petal dust with cornstarch until amalgamated, with an artist brush brush the orange to the pumpkin section of the ghost and the pumpkin figures. Mix the forest green with some cornstarch, and add to the stem of the pumpkins. Allow the the dust to dry to the touch, and cover the white section of ghost with pearl dust.
The cats, bats, and pumpkin figures’ eyes are all dotted with the yellow sparkles gel, to add an eerie look. Either use a short pointed art brush or a tooth pick. Dip the brush into the yellow sparkles gel, and allow to fall off the tip brush, trying to keep each eye the same size.

Assemble:
Once the dust and gel have dried it is time to bring the cupcake to life.
Fit a pastry bag with your favorite open or close star tip fill it with buttercream, Sydney and I thought a deep Autumn yellow would match well. To swirl the cupcake start on the outside top, holding the bag at a 90 degree angle, keeping even pressure swirl the buttercream to the middle. Release pressure and lift the pastry bag up and away from the cupcake.
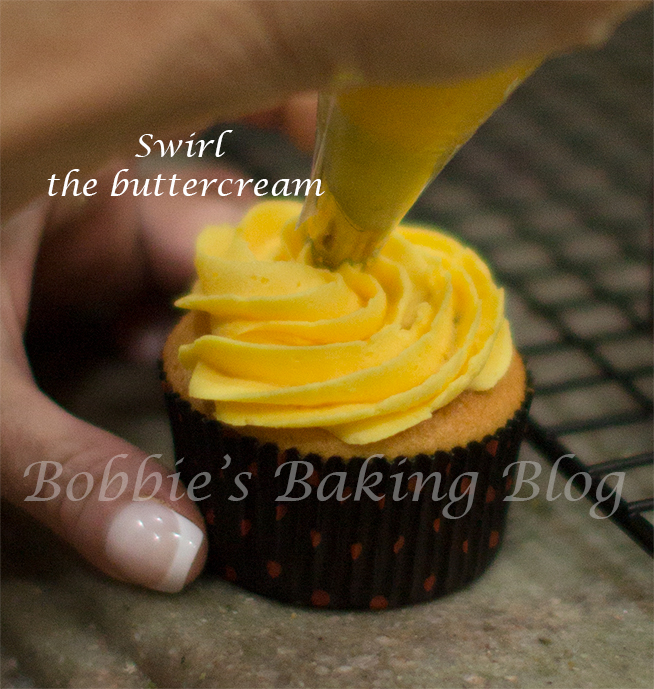
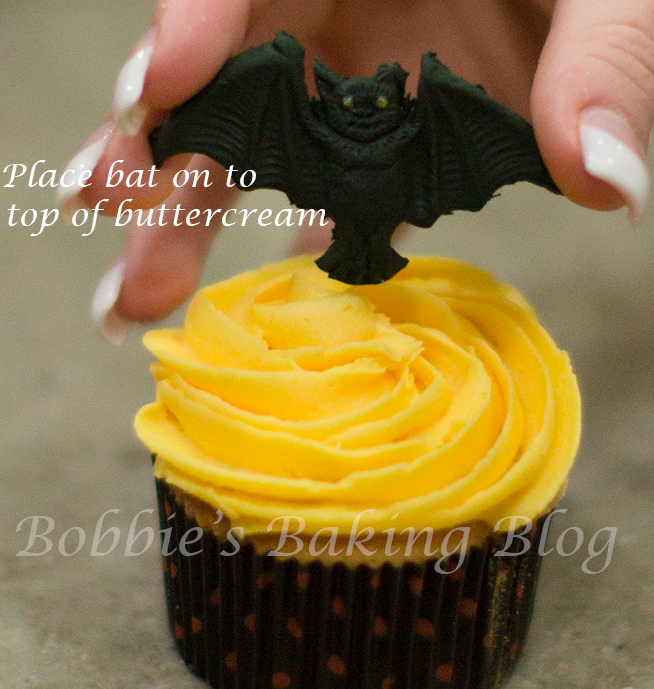
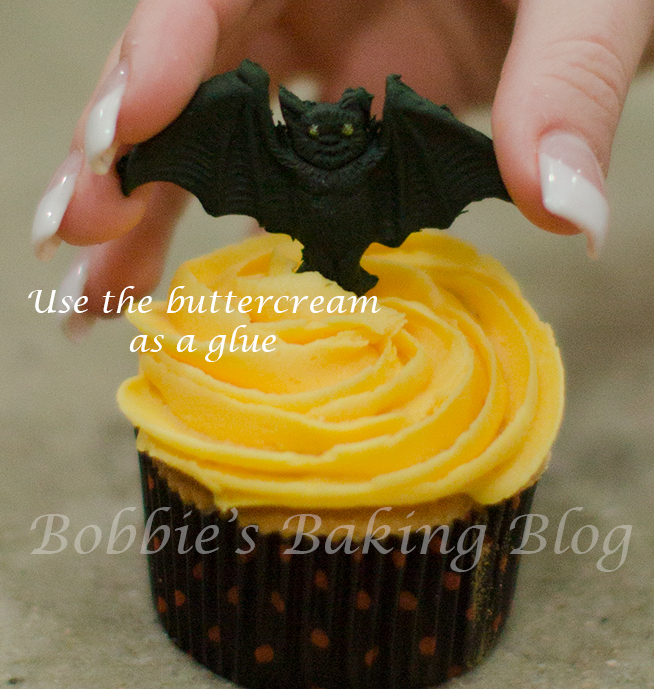

Choose your figure of choice and insert into the center of the swirled cupcake. Once the buttercream dries it will hold the figure like glue.
These Halloween cupcakes will be the star of any party!

Batty good!
Enjoy!

Voila!


Love them would you tell me what mold you used on the bat and cat? Nice job, keep up the great work!
Squires Kitchen Great impressions, thank you Norman. 🙂
Wow!! They look amazingly devilish but something is missing here; you should use sugar-daddys.co.uk/cupcakes halloween cupcake stand to display them. They will be perfect then.
I will definitely check the site out!