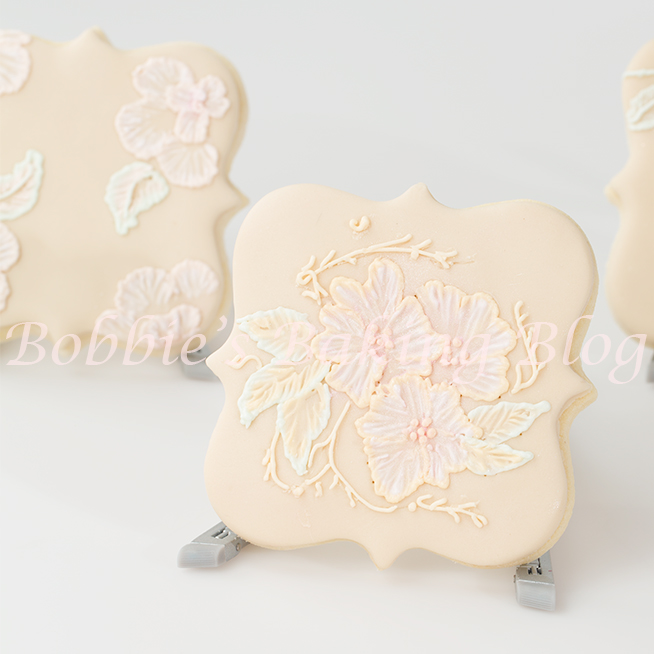
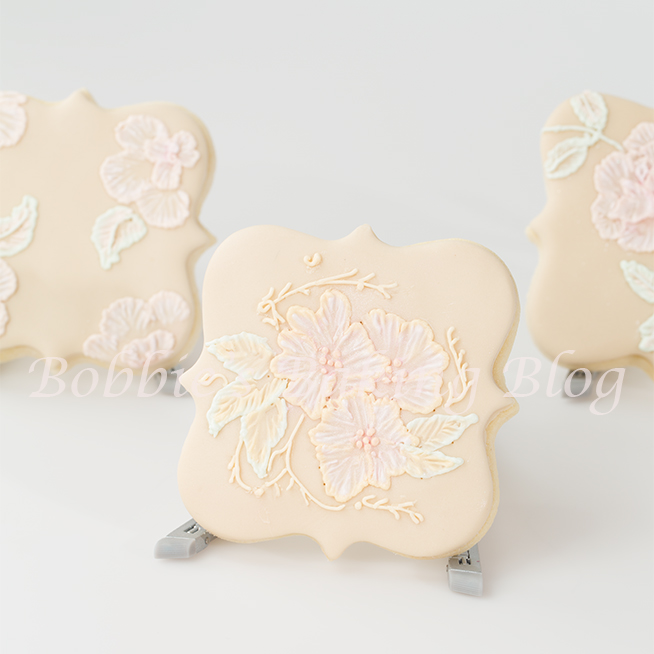
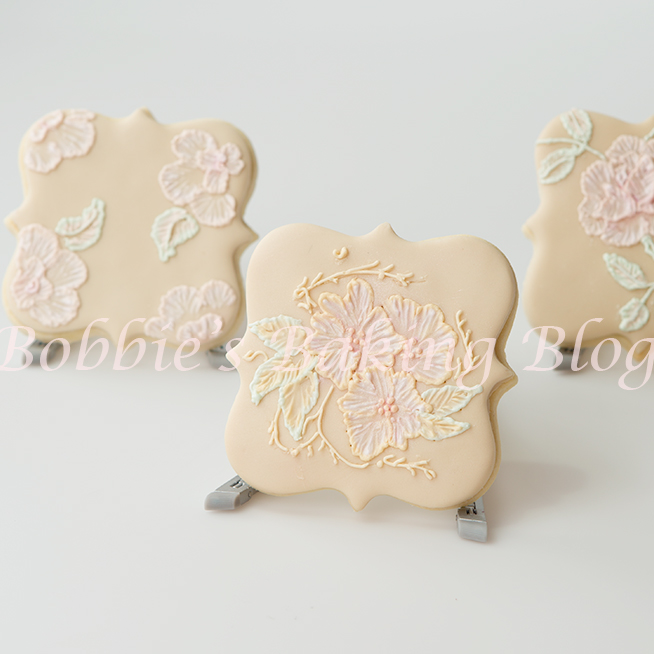
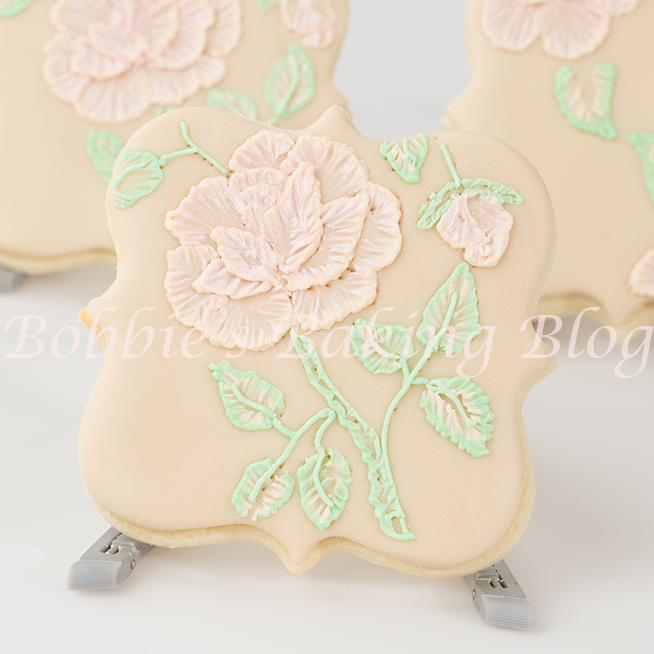
The raised royal icing petals and the dusting of the flowers take the cookie to a whole new level!
I thought it might be fun to learn a new method of brush embroidery..Victorian brush embroidery. Although the name sounds fancy the technique to create victorian brush embroidery is quite simple.
Victorian brush embroidery generally is applied with two colours of royal icing to each petal. The embroidery is raised and lightly petal dusted or painted with petal dust for an elegant finish. This technique is prefect for special occasions such as bridal showers, wedding favors, and wedding cakes!
I finished the cookies off with a few ivory tone vines for a delicate effect.
Victorian Brush Embroidery:
Try different designs for fun!
Equipment:
- Parchment paper cones or bags
- PME tip/tune writer 1.5
- Square # 2 and #4 brush
- Paper towel dry
- Paper towel damp
- PME sponge holder or sponge
- Small bowl
- Cocktail stick or tooth pick
Materials:
- Royal icing, off peak consistency
- Bobbie’s Vanilla Sugar cookie recipe
- Piping gel
- Cooled boiled water
- Food paste, brown, electric pink, golden yellow, green electric green, and pink
- Fondant cover cookie or glazed covered
Recipe for Ivory Colored Royal Icing:
- 1/8 toothpick electric pink, food paste
- 1/8 toothpick pink, food paste
- 1/4 toothpick golden yellow
- 1/4 toothpick brown
Spring Green:
- 1/4 toothpick electric green
- 1/4 toothpick green
Visit Shop 5th Avenue Cakes for supplies
Prepare your mise en place.
Add all your food paste colors and fold. Try not to beat (you do not want to incorporate air into the icing). Continue to fold with a spatula until ivory is achieved.
Prepare your parchment cones fitted with a tip PME #1.5 (or pastry bags) and royal icing colors. We used pink, ivory and spring green. Once your cones or bags have the icing inside place them either in the PME sponge holder or you can lay the tips between a dampened paper towel, (do not place a pin in tips,tubes, or nozzles the pin will scratch)! The Idea is to keep the air from hitting the icing and the icing crusting over.
Prepare your mise en place.

Victoiran brush embroidery mise en place
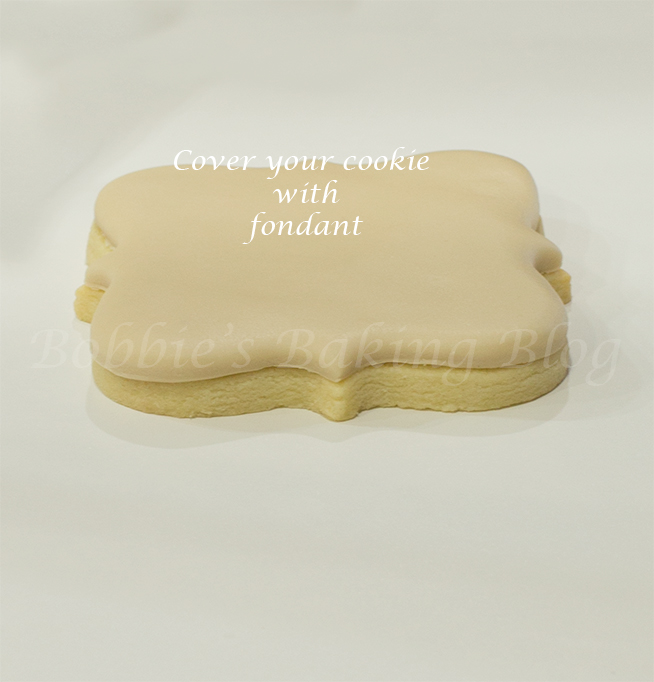
Pour boiled water in a heat proof glass and allow the water to cool. Roll out your fondant, cut the fondant to fit your cookie, and attach the fondant to the cookie; you may begin decorating at this point.
You will have 3 pastry cones fitted with a #1.5 tip ready to use; one cornet will have pink, one will have ivory, and the last will the be the spring green royal icing.
If you are a confident artist you can free hand pipe your design on the covered fondant. If the design is intricate I prefer to transfer my design on the fondant cookies with a pin. To transfer the image lay the design on the cookie, follow the lines, and prick them with a pin.
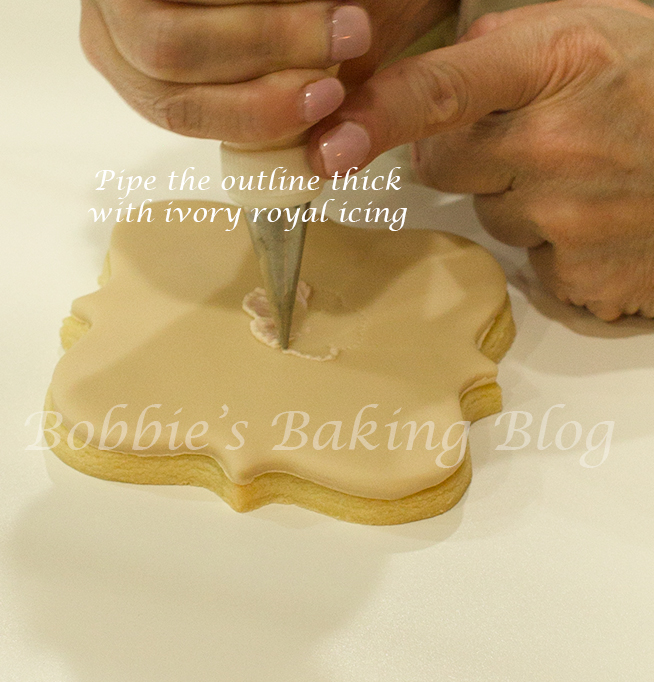
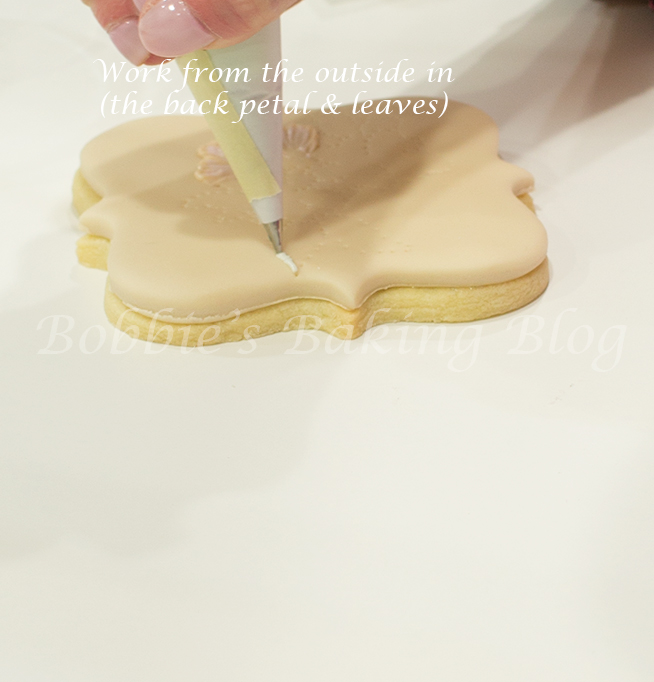
For the Petals:
If you use a design that is not yours be sure to check the copy right!
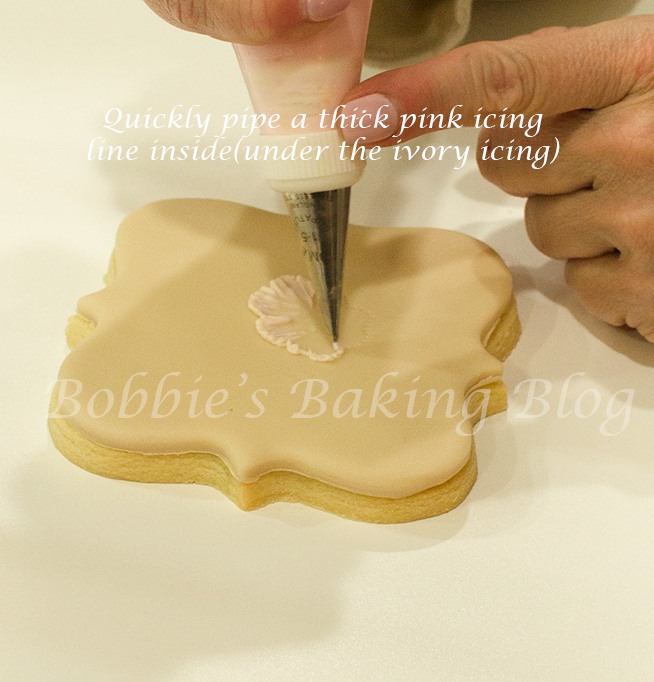
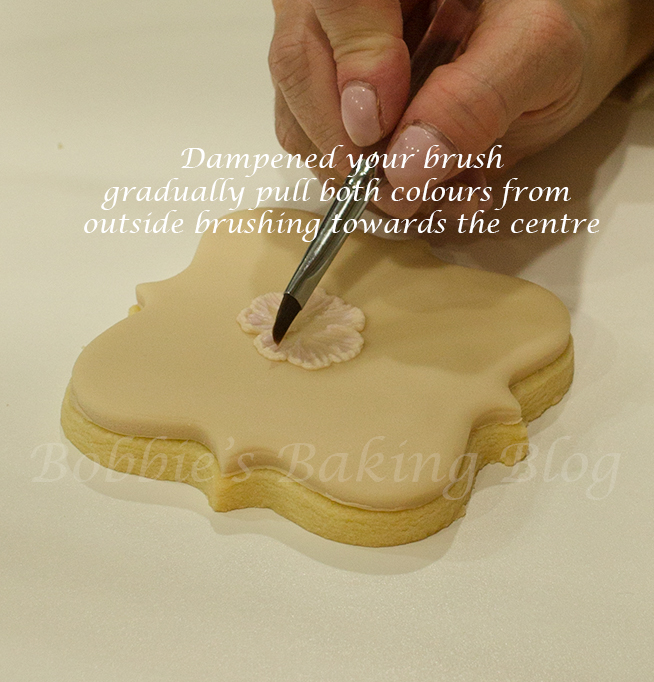
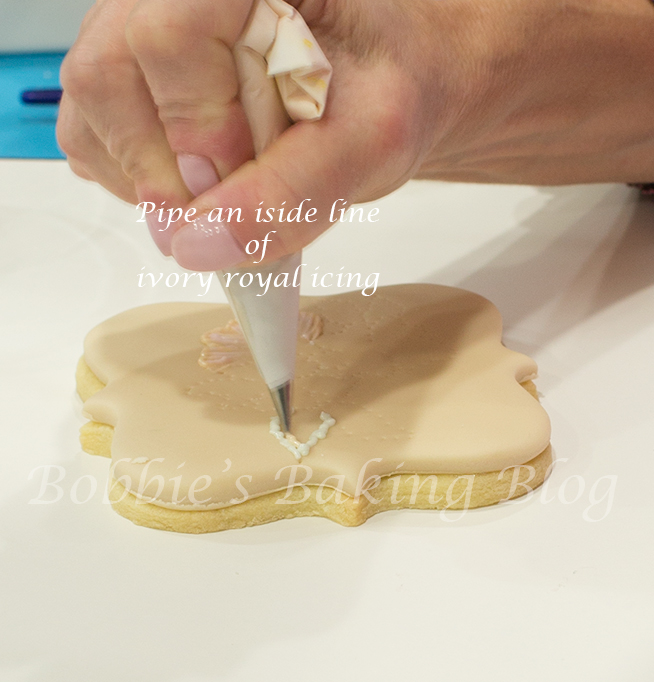
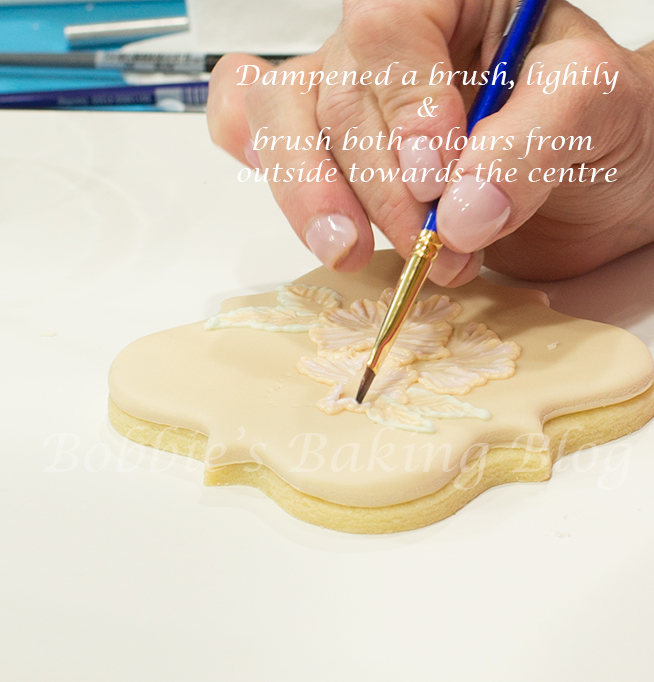
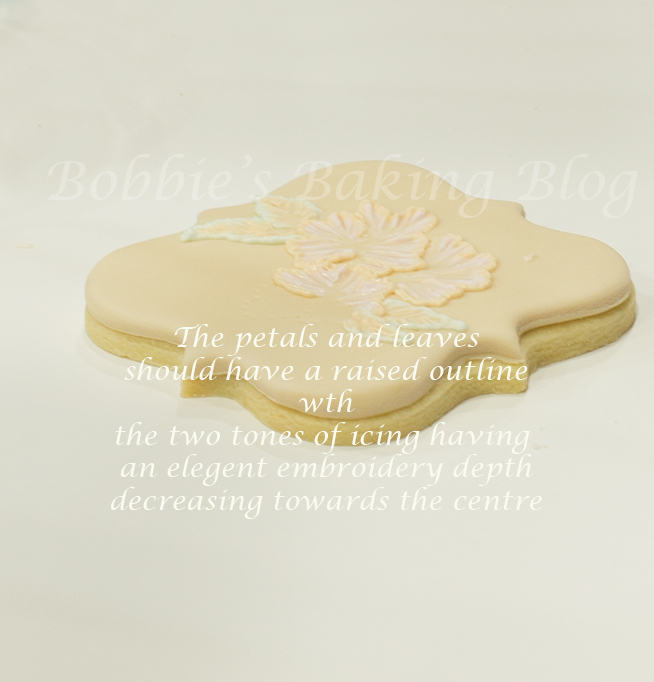
Beginning with the back petals, pipe one petal at a time with a thick zigzag line of the ivory royal icing, switch pastry cones to the pink royal icing, pipe the same thickness zigzag line of the pink inside with the ivory. (The colors should gently touch). Dip your brush in the bowl of cooled boiled water, wipe the excess water off the brush with your dry piece of paper towel, brush from the outer ivory line, but do not break the line, through the pink pulling towards the centre of the petal. Move on to the next petal until the flower is finished.
A successful victorian two tone embroidered design will have a raised royal icing edged petals with inner lines showing both colors and become thinner as the lines reaches the centre of the flower.
Remember to keep your tip either covered, on the sponge, or have a pin in the hole when you have finished using a color.
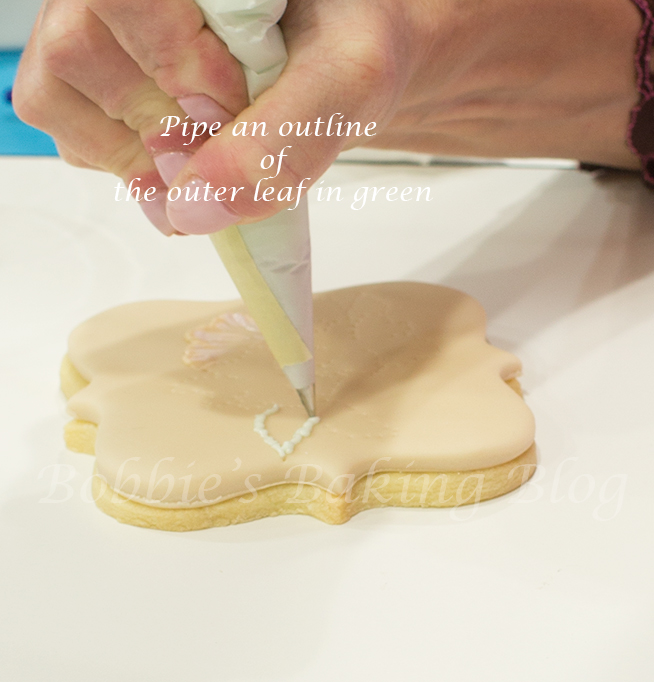
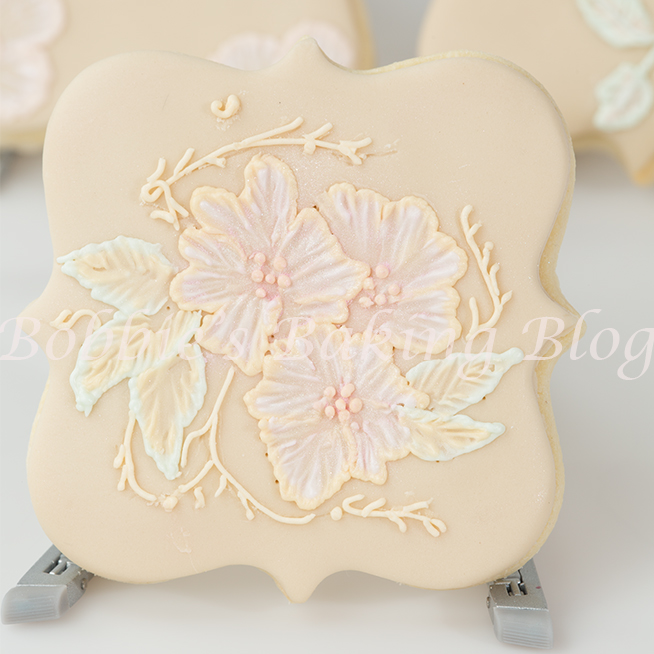
For the Leaves:
Remember this method works brilliantly on cakes!
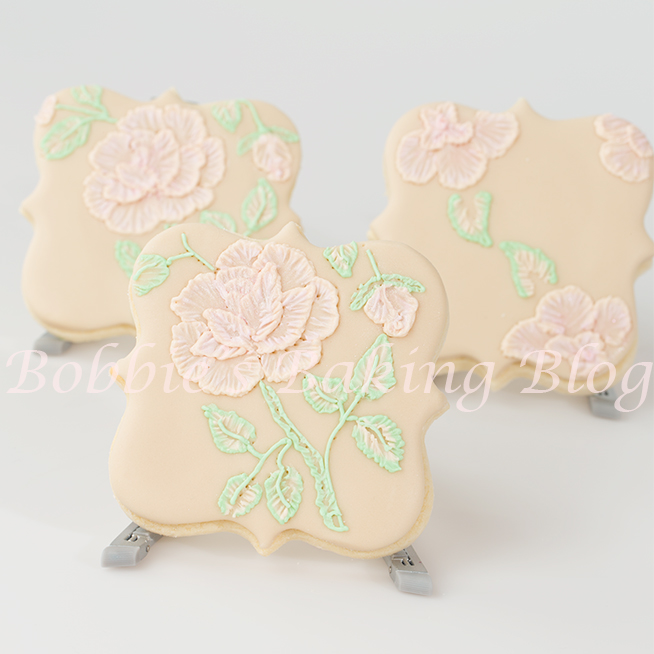
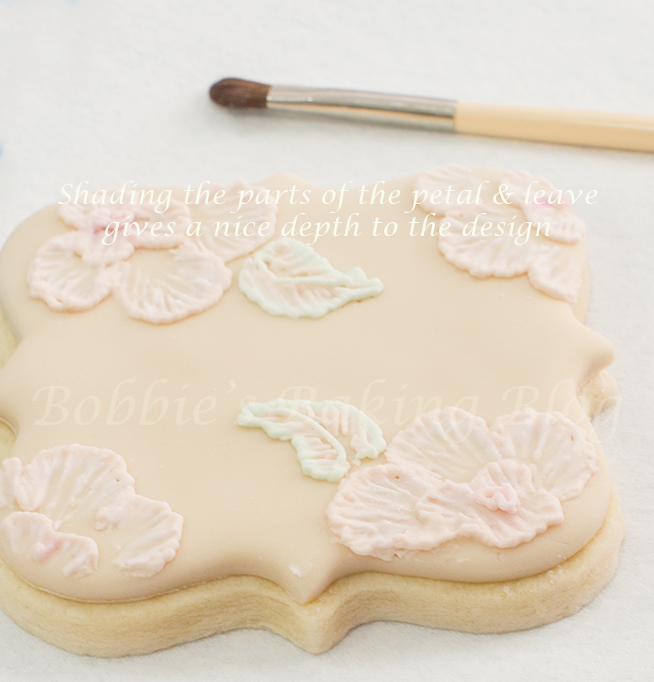
Generally I embroider the leaves last working from the back leaves forward, unless the design dictates they need to be embroidered first. Pipe a thick zigzag line of spring green, change piping cones to the ivory, pipe the same zigzag line thickness of ivory inside the green (again the colors should gently touch), and using your lightly dampened brush stroke from the outer spring green, without breaking the line, a diagonal line downwards toward the centre of the leaf. Move to the next leaf following the same method, and continue until all the leaves on your design are finished.
The leaves should have raised royal icing edged with inner lines showing both colors and become thinner as the lines diagonally reaches the centre of the leaf.
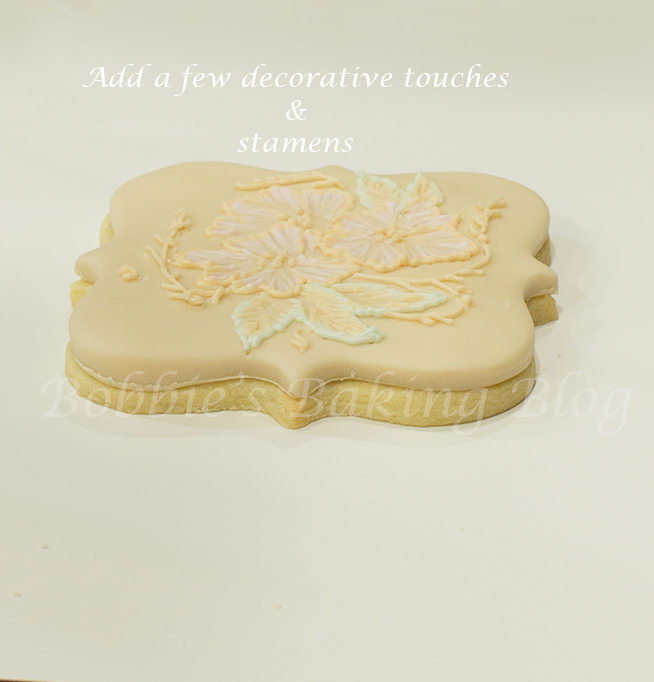
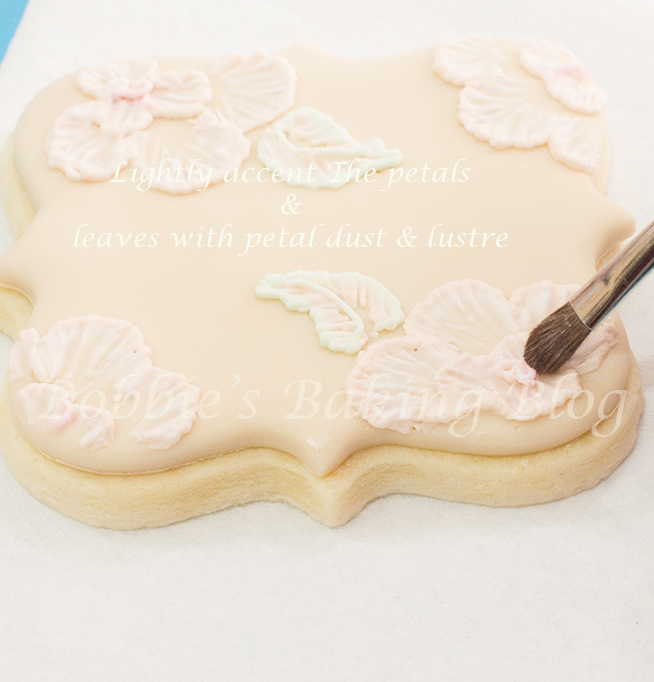
Finishing Touches:
I added a few twigs, stamens and buds, opted to not have a border due to the design and colored the icing with petal and lustre dust to add a depth of realism to the flowers.
For video tutorial
By adding a few extra steps to your brush embroidery you will have transposed your cookie from beautiful to luxurious!
The long stem rose gives a romantic effect to victorian brush embroidery!
Enjoy!
Voila!


Wooowwww bobbie…i have already seen your creations….ckckckkckck…amazing…really a WOWWW …wish i could learn from u here in indonesia.
Just GORGEOUS Bobbie!!! Thank you for sharing!!!!
Thank you Lila
You always leave the nicest comments