 Un Panier de Croissants.. A Basket of Croissants
With Mother’s Day just around the corner Sydney and I have had numerous request to teach a class on Pâte à Croissants (Croissant dough). To be honest I was not ecstatic at the thought of conducting a culinary class on croissants without having taught a beginner bread and pastry class. Pains sucré or sweet bread dough has caused calm sane people to revert to a two year old having a tantrum. However a good friend of Sydney’s wanted to learn the method and technique to prepare croissants for a Mother’s day brunch she was hosting; her mother had just finished a long painful battle with breast cancer and this is going to be their first Mother’s Day without chemotherapy. I could not in good conscience refuse.
Sydney and I decided six students would have to be the limit, three students per instructor seemed appropriate. In theory the recipe has few ingredients yeast (fresh or active dry), flour, liquid, sugar and salt. As I mentioned prior jumping into creating flaky light buttery croissants without any previous knowledge of yeast breads seemed a recipe for disaster. Sydney and I began brainstorming a successful, flourishing, and enjoyable pains (bread) class. Since croissants can take a minimum of 12 hours to a maximum of 3 days,depending how the method used, we concluded it would be advantageous instead of only teaching croissants to teach a pâte feuilletée (puff pastry), pâte à brioche (brioche), and pâte à croissant (croissant) class over a 5 day period.
Croissants are, in my opinion, across between pâte à brioche and pâte feuilletée. Both puff pastry and croissants need the détrempe and barrage at the same temperature, , rest in the refrigerator between rolls, and use the same method of rolling, folding, and turning. Brioche and croissants each use yeast to rise the dough, and need to be proofed more than once.
After we completed a schedule for the week, we were ready for our group of students, the only prerequisite I asked was each student needed to have an understanding of yeast breads. We prepared six syllabuses, recipes for the puff pastry, brioche, and croissant, and each student received a mini food processor. When Monday arrived we were ready and motivated.
Since my intention is not to bore you with the details of the entire week from here on I will only be referring to the croissant portion. I must admit, for most part, the class went rather smoothly and all had a tremendous time. I will start with same line I said as we began the croissant portion, “please take a deep breath and release slowly.” If you are confident the dough will be submissive to you.
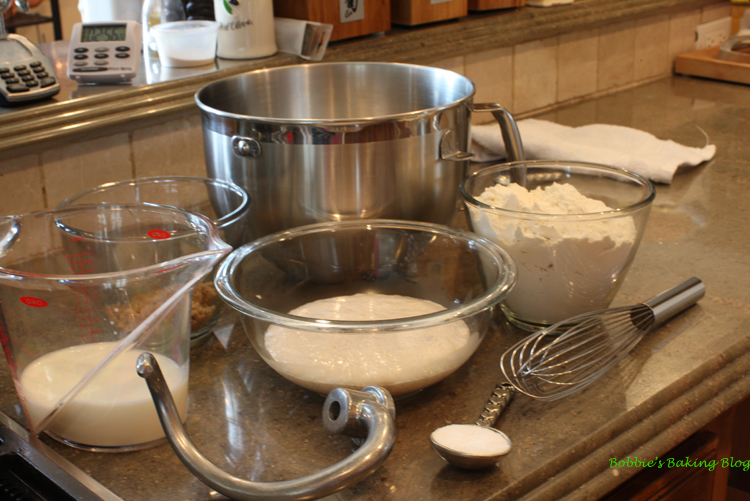
Prior to beginning anything prepare your mise en place
We used fresh compressed yeast (also called cake yeast), but active drive yeast works fine and I have given both versions.
Pâte à Croissant Dough 11:
244 grams/ 1-cup whole milk, warm about 35 degrees C/ 95 degrees F
110 grams/1/2-cup heavy cream, warm about 35 degrees F/ 95 degrees F
29.9 grams/ 1.3 ounces fresh yeast or 13 grams dry yeast/ 1 Tablespoon, plus ¼ -teaspoon
4 grams/ 1- teaspoon sugar
18 grams/1 Tablespoon salt
50 grams/ ¼-cups brown sugar, granulated white sugar may be subsituted
480 to 540 gram/ 4 -4½ -cups T-45 or all- purpose flour, reserve 60 grams/ 1/2 cup
340 grams butter, cold
25 grams/ 2-Tablespoons flour
Prepare your mise en place. In a small bowl whisk the flour and set aside covered.
Détrempe:
If using dry yeast: proof the yeast with the 110grams/ 1/2 cup warm cream, 4 grams/ 1-teaspoon sugar, and yeast. Adding the yeast to the warm cream and then the sugar allowing it to sit for about 7 minutes.
If using fresh yeast:
a. Dissolve 1 teaspoon sugar in 11o grams/ 1/2 cup cream, warmed to 90°F – 95°F
b. Add crumbled Cake Yeast to sugar solution.
c. Stir yeast until completely dissolved.
d. Let mixture stand until yeast begins to foam vigorously (5 – 10 minutes).
e. Add mixture to remaining ingredients.
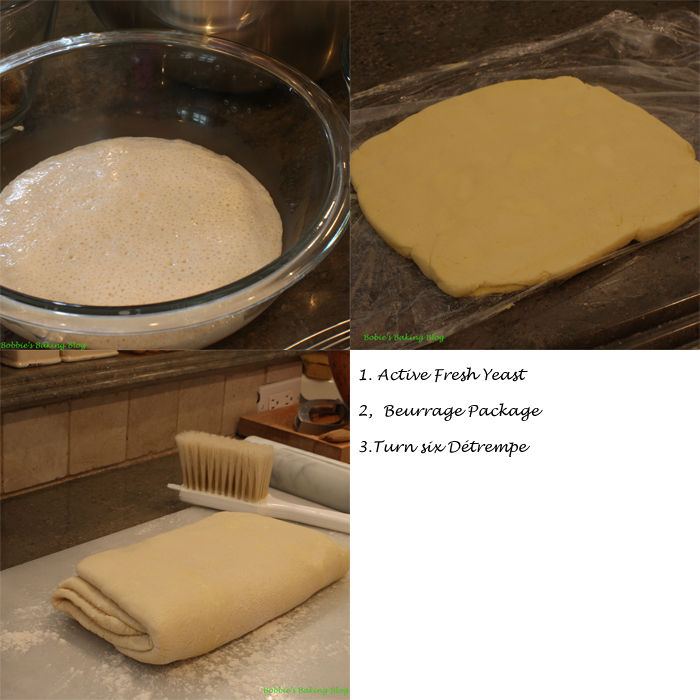
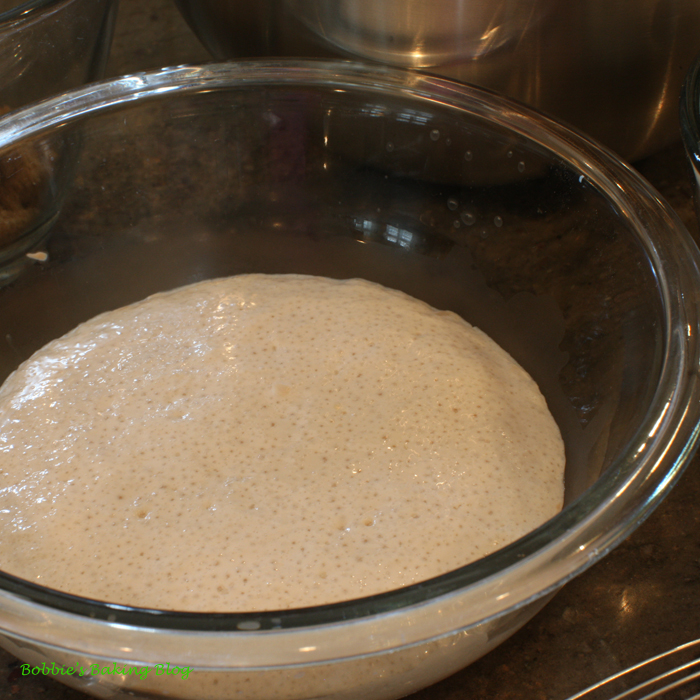 Either yeasts will look the same once foaming
In the bowl of a standing mixer add the yeast mixture, 480 grams of flour (reserving 60 grams/ 1/2-cup flour if needed), and the brown sugar whisk together, by hand, and then whisk in salt.
Using your dough hook on low speed add the warm milk until the dry ingredients are moistened. Raise the speed to medium (#4) and amalgamate for about 4 minutes. The dough should be silky, smooth, pulled away from the sides of the bowl, and will still cling to your fingers slightly.
Place the dough in a 4-quart bowl 0r dough bucket that has been lightly greased with butter or cooking spray. Cover the bowl with the lid or plastic wrap. Place the dough in room temperature room (26 degrees C/80 degrees F ) for 30 minutes. If the room is colder preheat your oven to 150, turn it off, and the oven should register at 26 degrees C/ 80 degrees F. Place the dough in the oven.
Using a greased rubber spatula, gently fold the dough.
Cover and place in the refrigerator for at least 2 hours to 8 hours.
The Beurrage:
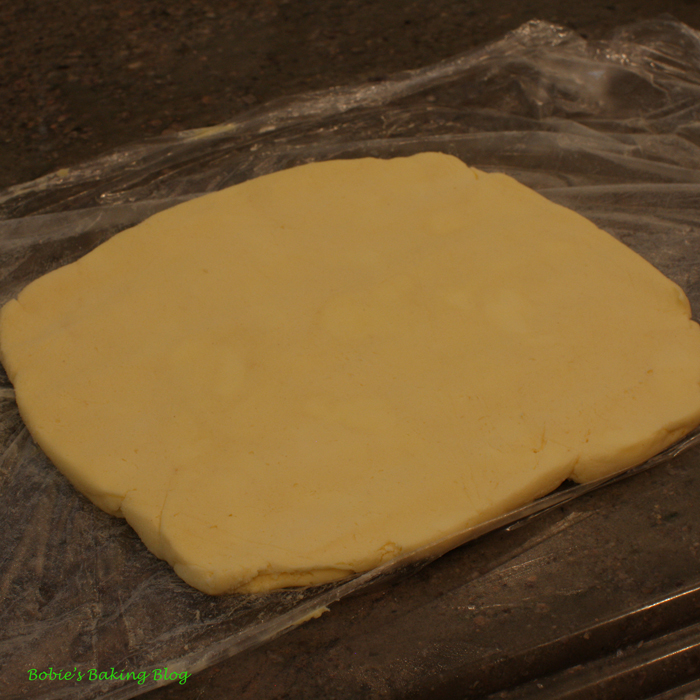
Cube the butter into dice size pieces. I found the best way to combine the butter with the flour, is to place the cold cube butter and 25 grams of flour in the bowl of your standing mixer on low speed, with the paddle attachment, mix the butter and flour. Once the mixture is amalgamated shape into a 28cm x 28cm 9×9-inche square (no thicker than 3/8 of inch). The butter should still be cool but workable- about 16 degrees C/ 60 degrees F.
Use it right away, the temperature must be at 16 C/ 60F to laminate properly.
Pâton:
**Laminate the dough
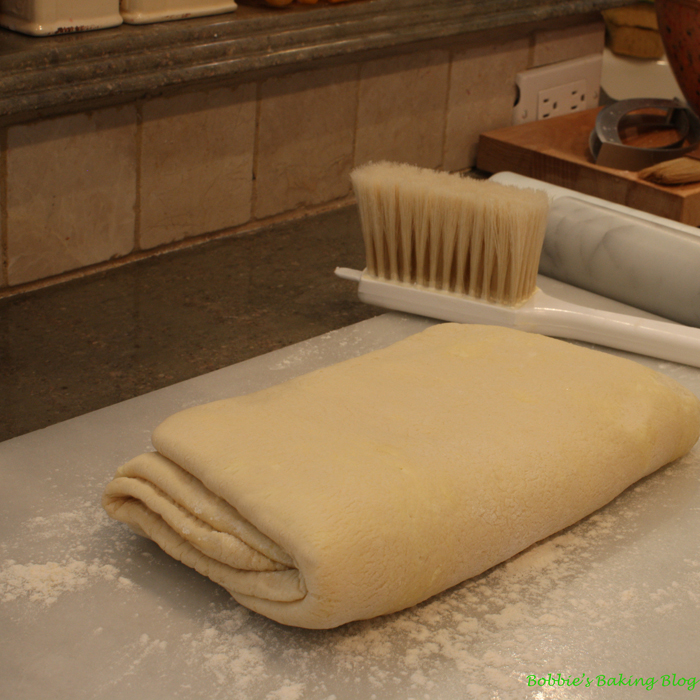
Take the dough from the refrigerator and roll out to 31 x 31 cm/ 12.5 x 12.5 –inches. Place the barrage (butter square) diagonally in the center of détrempe (dough) using the back of knife mark the dough at the corners of the butter, remover the butter at form flaps where the marks are. Roll the flaps a little. Now moisten the flaps slightly place the butter back into the center, diagonally. Wrap the butter by securely overlapping the flaps slightly. Wrap the pâton in plastic film and allow it to rest in the refrigerator for 30 minutes, but no longer.
** The laminating method is one Rose Levy Beranbaum uses, I believe it works best.
Turning the Détrempe:
First Turn:
Place the dough seems side up on a floured marble board. Keep your work surface lightly floured, gently roll the pâton into a long rectangle about 50 cm/20 inches long by 18 cm/ 7inches wide. Brush off the flour from the dough’s surface and give it a business letter fold (folding into thirds). Wrap the folded dough in plastic film, lay on a parchment paper lined ½ baking sheet, and allow it to rest in the refrigerator for 40 minutes. Mark the paper to keep track of the turns. I generally like to complete a total of 6 turns, but a minimum of 4 turns is fine. The dough will let you know!
Second turn through four or sixth turns: (you may do up to six turns if the dough allows)
Start with a clean work surface that has been lightly floured. Position the dough so that the spine is faced to your left (like a book) and press down the edges of the dough with a rolling pin to keep them straight. (The upper part tends to roll out more than the bottom part). Roll and fold the détrempe the exact same way, but turn it over occasionally to keep the seams and edges even. Be sure to roll into all four corners of the détrempe, and use a pastry scraper to even the edges. A total of four turns should be completed; the third turn can have a double fold equaling four turns.
**The Portefeuille (wallet) Fold (only if you decide not to do four to six turns)
Start again with a 27cm/11 inch side running from your left side to your right. Roll the dough into a rectangle 40 t0 42cm to 25 to 27cm/ x 16 to 18-inch inches long by about 10 to 12-incheswide. Fold the left and right sides of the dough into the center, leaving a little space in the center, and then fold one side over the other as though you were closing a book. This is the famous double turn, also known as “le portefeuille (the wallet”).
The Portefeuille should be chilled for 2 hours.
** This is a method used by professionals.
Shaping the croissants:
To Shape the Croissants:
Begin with a cleaned flour workspace
Roll out the dough to 60 cm/24-inchs by 43cm/ 17-inches.
Brush off all the flour. Fold the dough lengthwise so it ‘s 15cm/6-inche/ by 56cm/22-inches. Using a croissant cutter cut across the long side. Brush off all the flour. Fold the dough over lengthwise.
Damp a cloth to keep your hands moisten while stretching the triangles.
Using a croissant cutter (or a pizza cutter) begin to cut, if using a pizza cutter cut a triangle) cut through both layer all the way to the other side. Open the folded triangles, so for every full cut there are two triangles formed.
Shape one triangle at a time, keeping the remaining triangles covered with plastic wrap.
Use the scrapes of dough to place in the top of triangle, keep them covered as well.
Forming the Croissant:
1.Cut the triangle.
2.Unfold the triangle carefully, cut along the fold to separate.
3.Gently stretch the triangle twice it’s original length about 23 cm/ 9-inches long.
4.Enclose a piece of scrape dough to pump up the middle.
5.With the point facing you roll the dough towards you, gently moving your hand down out to the side.
6.Curve the pointed ends of the rolled croissant to form the traditional shape.
To Shape the Croissants:
Begin with a cleaned flour workspace; roll the dough to 35.5 by 61 cm/14 by 24 inches.
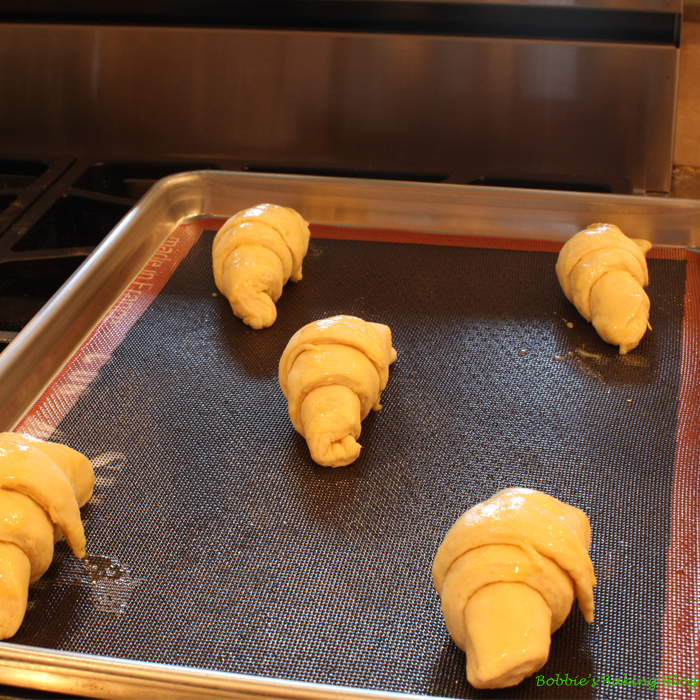
Gently stretch each triangle about 9-inches long; first pull the base sideways- gently, but with a firm hand-then holding the base in your left hand, use your thumb and two fingers of your right hand to work down the length, elongating it. Place the triangle on your work surface with the narrow point facing you. Grab a ball scrape, shape into a football shape, and place the wide base of the triangle. Roll the base over one of the football of scrape dough to encase it about ½ inch. Continue rolling with the fingers of your left hand, keeping the triangle stretched with your right hand. Place the croissant on silpat lined ventilated sheet pan with the point underneath. Curve the sides so that they turn in on the side of the croissant facing you. Keep the croissant covered with plastic wrap while you shape the rest. Set about 6 to7 rolled croissants, evenly spaced, about 2 inches apart giving them room to grow.
Place the baking sheet of croissants in a warm place to rise, ideally about 26 degrees C/ 80 degrees F for about 2 hours or until the croissants have doubled in size and have achieved a light texture.
Egg Wash Glaze:
50 grams/1 whole egg
14 grams/ 1-tablespoon heavy cream, half and half, milk or water
Sugar for sprinkling, optional
Baking the Croissants:
Preheat the oven to 218 to 232 degrees C/ 425 degrees F, arrange the oven racks so one rack to the lower and upper positions. Prepare egg wash and very lightly with a pastry brush, brush the egg wash onto the croissants.
Open the oven, spritz the oven generously with spray bottle of water and quickly close the door. Open the oven door again, slide the croissant sheets into oven and re spritz. Turn down the oven temperature to 240 degrees C/ 400 degrees F. after about 10 minutes rotate the croissant sheets. Reduce the oven temperature to 191 degrees C/ 375 degrees F and continue to bake the croissants till deep golden brown, internal temperature should register at 99 degrees C/ 210 degrees F. (about 8 more minutes). They will finish baking while they cool.
Cooling the Croissant:
Once the croissants have achieved the color and correct internal temperature, remove from the oven and transfer to a cooling rack for about 20 to 30 minutes.
Since Mother’s Day is still 2 weeks away I cannot tell if Sydney’s friend created light flaky croissants for her brunch, but now she knows how!




Wonderful Post. Gorgeous pictures, job well done!
Yum! This is a fantastic idea for Mother’s Day, good work Bobbie!
These croissants look magnificent! You really do a great job at making all your food look really elegant! I haven’t been to your site for a while and coming back proves to me that I should really check in more often! Keep up the awesome work!
Thanks for the recipe, I think i will try to make this for my mom!
Wonderful Croissants! I tried to make these a few months ago for some reason they didn’t turn out! You have given me the inspiration to try again! Thank you!
Yum, delicious croissants! And wonderful pictures!
Beautiful pictures! I love the recipe, its written in so much detail! I feel like I can really understand it. And the they look so tasty, come to my house for Mother’s Day!!
Your croissants look fabulous! You have a great blog. 🙂
How did the Gluten Free Brioche turn out? I clicked on the pâte à brioche link but that didn’t have a gluten free version like the Puff Pastry. Thanks for the info on the GF Croissants, I will give them a try.
I tend to be very picky when judging my own work, but everyone who had the brioche enjoyed the color and flavor. I will be giving a gluten free pâte brioche recipe soon. Good luck with the gluten free Croissants; I would relish hearing what you think!
Very informative tutorial, your directions are straight forward and easy to follow!
@byoo. I totally agree.