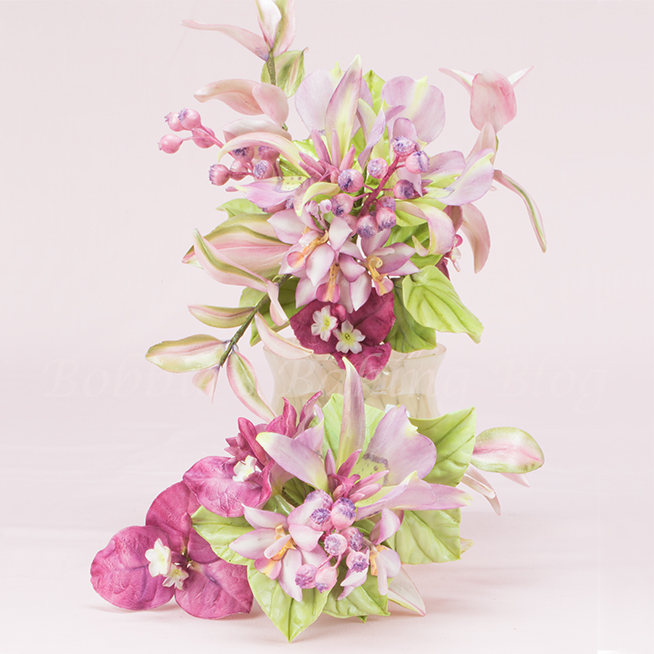
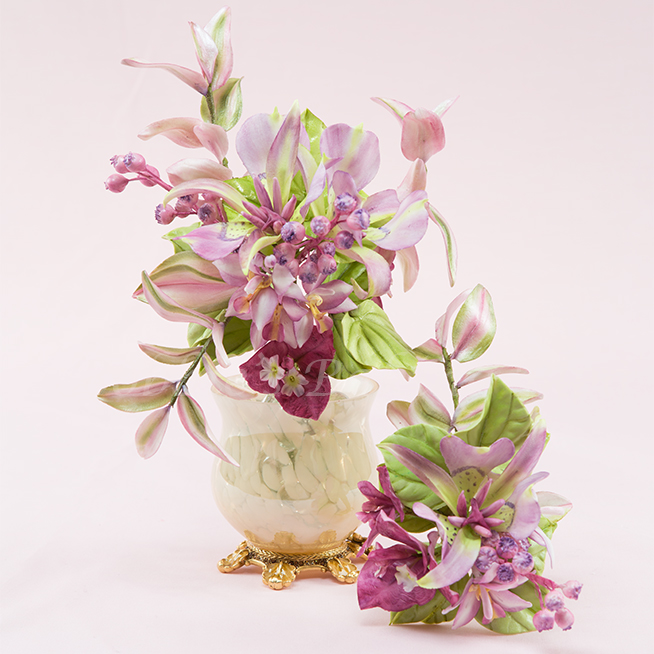
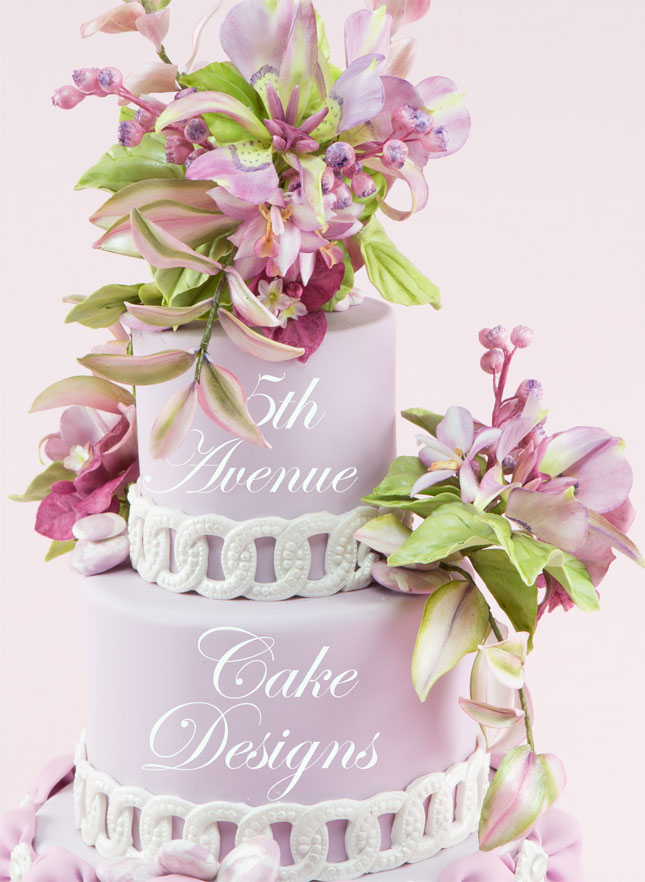
I am tempted to put the The Elegant Summer Sugar Spray in my China cabinet; instead of the cake I will be creating!
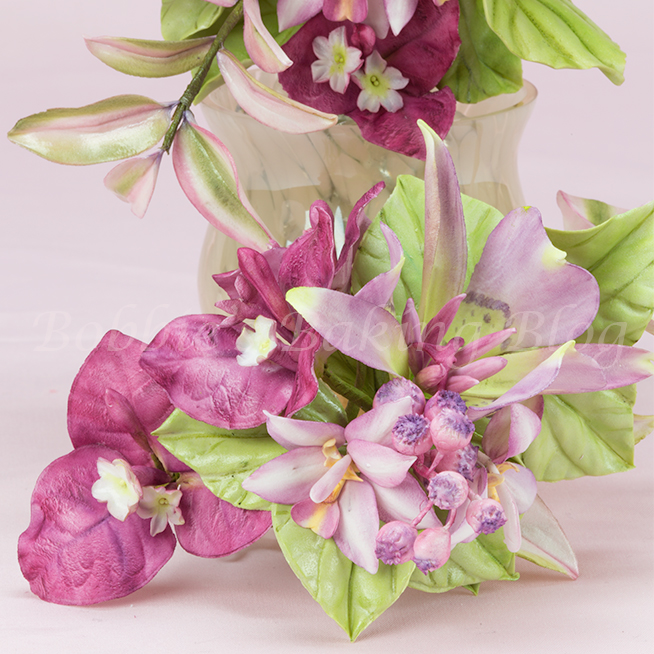
With Sydney’s 21 birthday a little more than one month away, I am still trying to create the perfect spray for her cake. Sydney saw a similar spray in Alan Dunn’s Creative Cakes when she was home for spring break. Sydney loves orchids; there are five Spathoglottis orchids (better known as ground Asian orchids in the Elegant Summer Spray). The rest of the sugar paste flowers and foliage consist of four Mariposa Lilies, seven Peperomia leaves, four vines of Tradescantia Zebrina’s leaves, three Medinilla cumingii berry sprigs (or as we refer to them as Sydney berries), and five Bougainvillea.
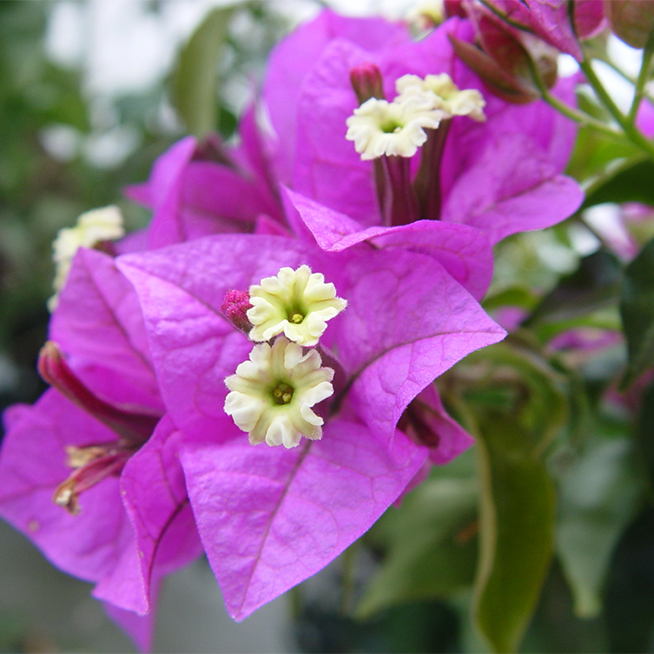
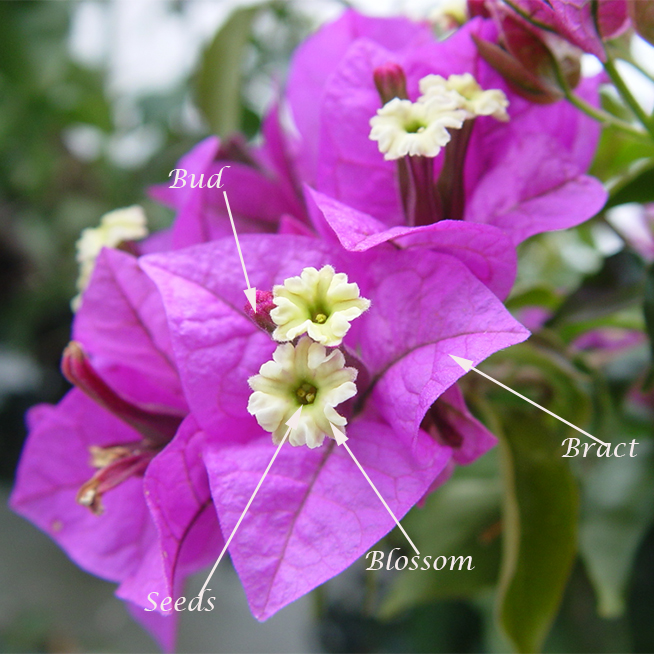
The Bougainvillea is the sugar paste flower that I will show how to create. In 1768 Admiral Louis de Bougainvillea, during his journey to the Pacific Ocean, discovered the vine that now bears his name. The Brazilian beauty is one of the most popular, spectacular, and beautiful tropical plants. The modern day hybrids of Bougainvillea are among the most beautiful of flowering vines. The vibrant magenta color of this vine comes not from the small tubular flowers, but from the 3 large paper-like bracts that surround each flower. I adore The Bougainvillea and thought it was the perfect addition to this spray.
Sugar Paste Bougainvillea:
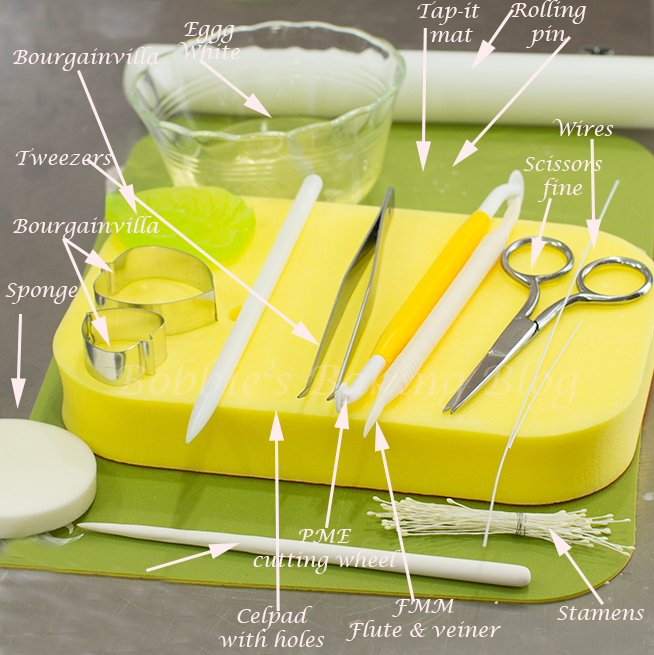
Equipment:
- Small five blossom cutter, Sunflower
- Bougainvillea cutters, ISAC
- Bougainvillea veiner,ISAC
- CelPad, CC
- Celstick
- Ceramic silk tool, HH
- PME small cutting wheel
- Veining and silk tool, FMM
- Cosmetic Pad
- Little round yellow stamens
- Tweezers
- Fine scissors
- Small paste rolling pin
- 22, 26, and 28 gauge white wire
- 1/2-width withe tape
- 1/2-width nile green tape
- Groove board, optional
- Artist brushes
- Steamer,optional
- Size chart, sewing store
- Stay fresh mat
- Shaping foam
Materials:
- Sugar Paste/gumpaste
- Aubergine petal dust, CK
- Plum petal dust, CK
- White petal dust
- Vine green petal dust
- Egg white
- Crisco
- Corn starch
Prepare your mise en place.
The Buds and Blossoms:
Generally the Bougainvillea has two buds and one blossom or two blossoms and one bud, with three of the same size bract surrounding them.
The Bud:
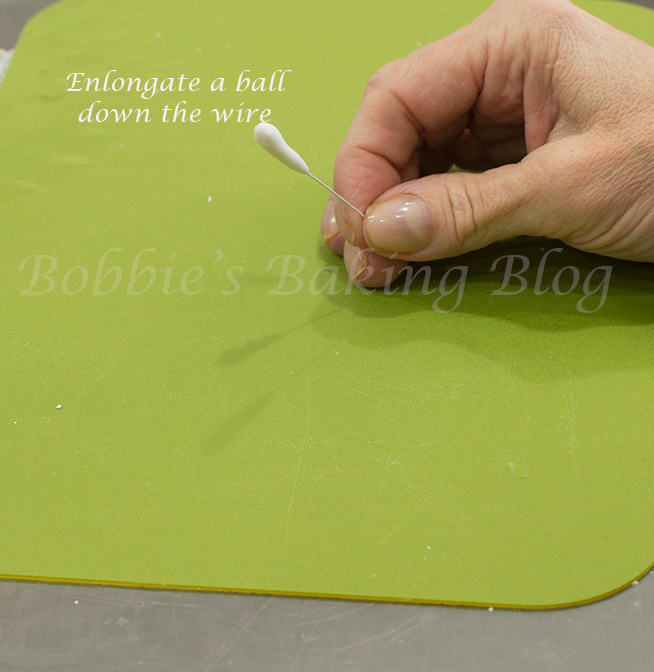
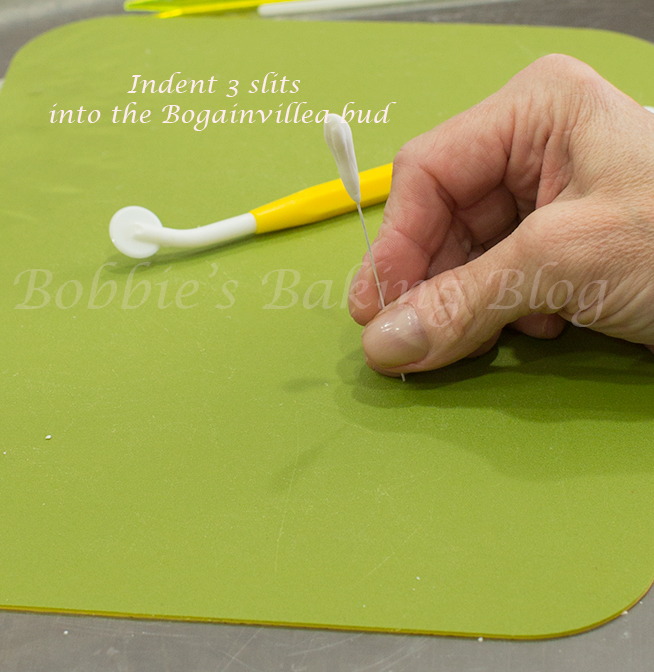
Condition a small piece of sugar paste and roll the paste into a ball, your little sugar paste ball should be a #5 size ball. Dip a 26 gauge wire into your egg white, wipe off the excess, and insert the wire into the sugar paste/gumpaste ball. Roll the end of the ball with your thumb and fore finger down to the wire to form a slender bud. Using a PME cutting wheel to indent three slits. Gently turn the bud counter clockwise to give an illusion of a bud about to open. With a cocktail stick or tooth pick poke serval holes. Allow to dry.
The Blossoms:
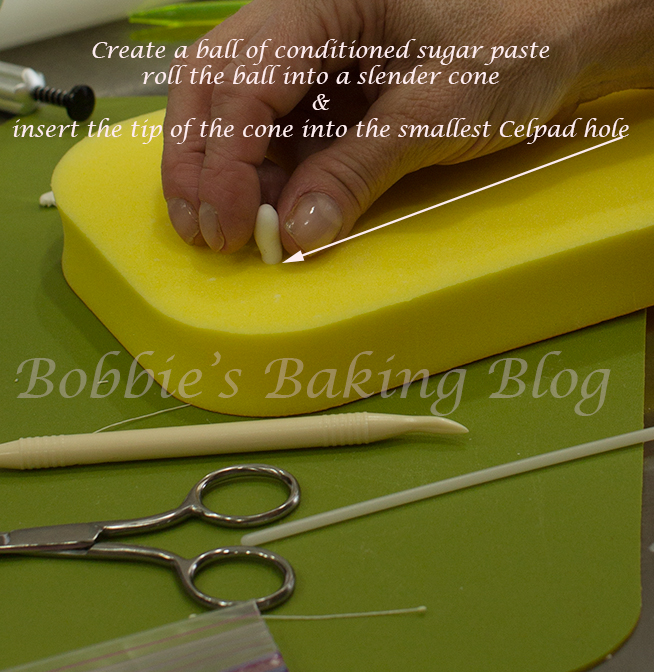
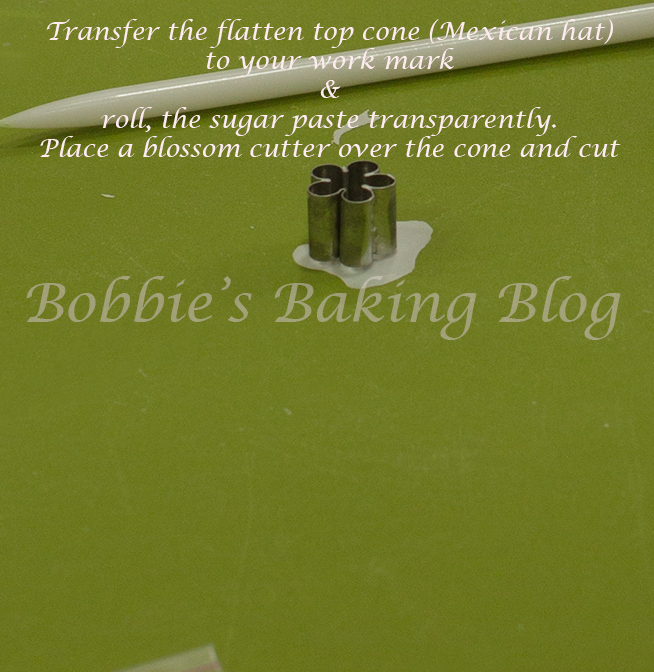
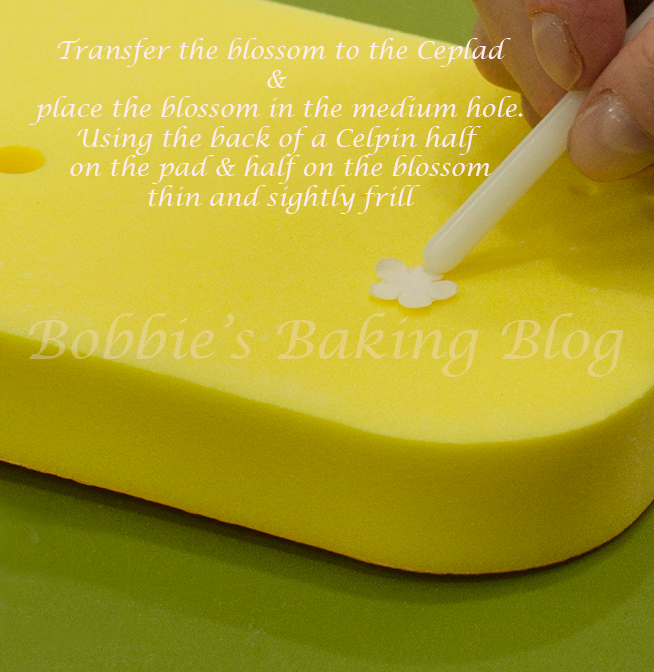
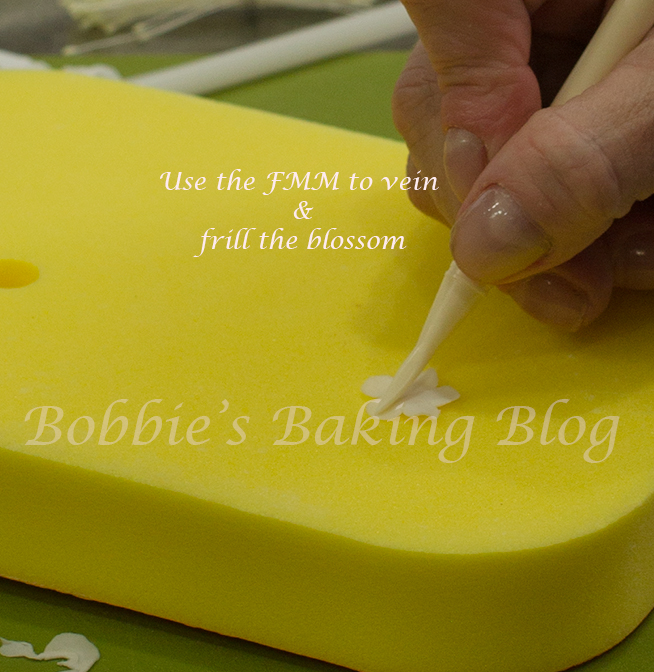
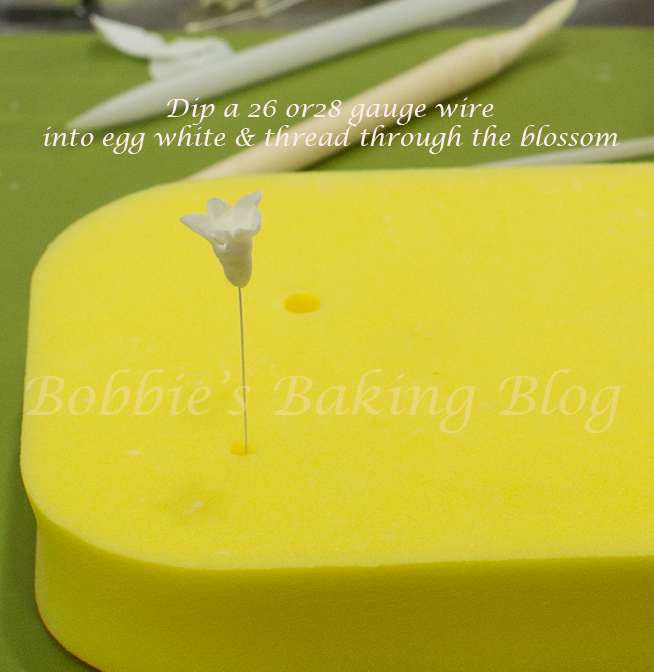
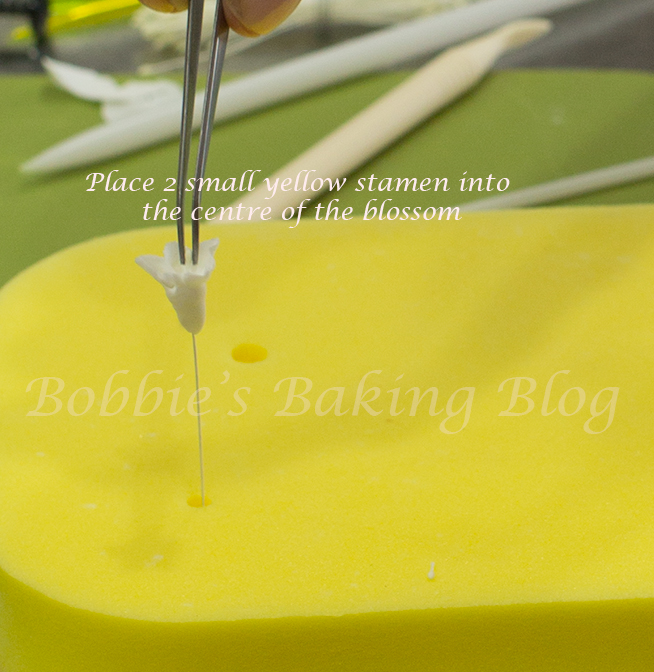
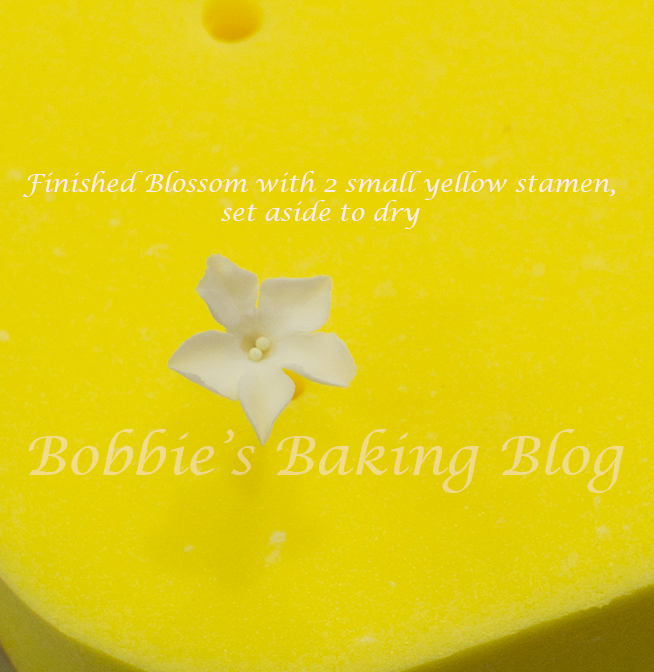
Knead and condition #7 piece of sugar paste, create a small ball, turn the ball into a very slender cone. Place the cone into the smallest hole on your Celpad with holes. Roll the top flat, gently move to a work mat and roll out the brim into a thin Mexican hat with a Celstick or Celpin. Place your blossom cutter over the cone and cut. Transfer the blossom back to the soft side of your Celpad. Using the blunt end of your Celpin, half on the petal and half on pad, thin the petals as you frill slightly. Since the blossoms are quite frilled, use your veining tool to frill the petals as you curl towards the centre. Insert an egg white dipped in 28 gauge wire into the cone about 2/3 the way up. I find if you place the wired blossom in the smallest hole of the Celpad it is easier to do the next steps. With the pointy end of a Celstick, create a hole, gently indent the tip as you turn the Celpin. Place two small round yellow stamens in the hole with tweezers. The stamens are normally connected to a thin wire, cut the the stamens off leaving 1/4 of wire attached. Dip the very tip of the stamen wire into egg white prior to placing in the hole. The stamen should be barely visible.
The Bracts:
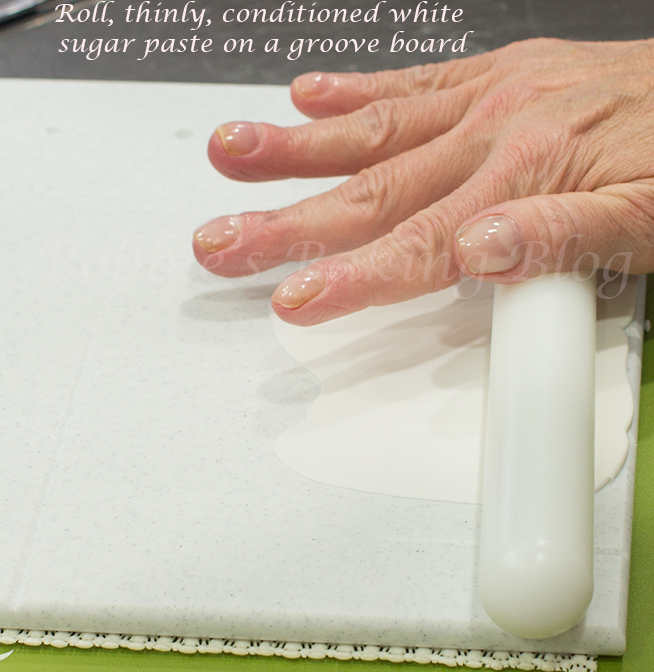
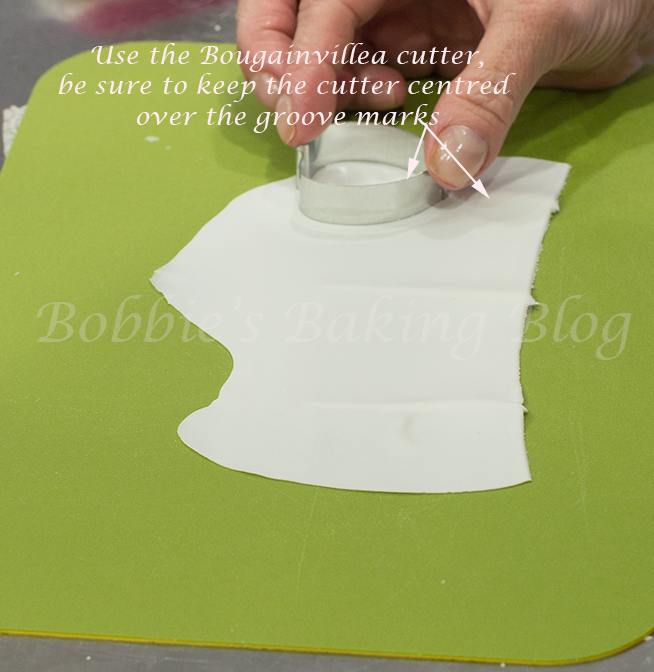
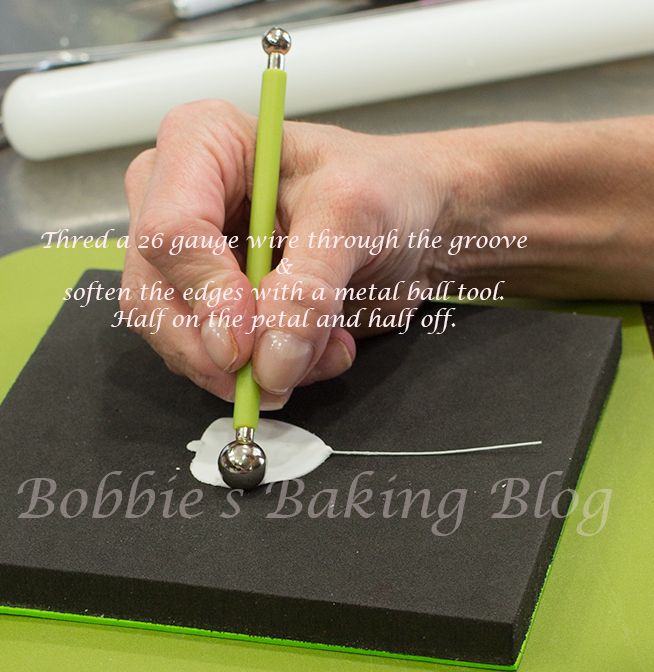
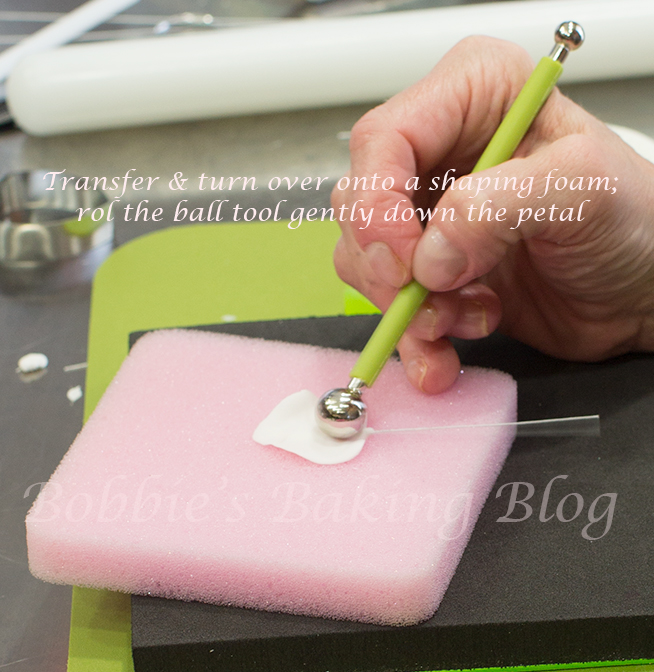
Knead and condition a #12 size piece of sugar paste/gumpaste roll into a log and place the log over the grooves of the groove board. Roll the paste transparently thin. However do not roll as thin as a petal; the bracts are a tad thicker. Transfer to a Tap-it mat or work space, use either the small or the large cutter and cut three bracts of the same size. Place two bracts under a stay fresh mat. Insert a 26 gauge wire through the groove on the bract. With a metal ball tool, half on bract and half on the pad, thin the bract without frilling. Lay the front of the bract on the Bougainvillea veiner and pat with your cosmetic sponge until you can see the veins come through the back of the bract. Gently transfer the wire veined bract to a shaping foam and roll the back of the bract lightly with a ball tool. Place the bract in the palm of your had, roll the silk ceramic tool adding a few veins.
Allow the bracts to dry. You will need at least fifteen bracts for five Bougainvillea. We prefer to create a five extra in case of breakage.
Colour and Assemble:
Colour the blossoms inside by the stamens with vine green dust from the centre out. Dust the outside with plum petal dust from the outer base to the inside petals, and use a little aubergine on the base.
Dust the bracts from the base up to the center, top down to center, and the sides towards the centre with plum dust. Once the entire bract is deeply dusted with the plum, add a little aubergine with a flat brush. Cut the aubergine from the sides of the bract and the centre vein.
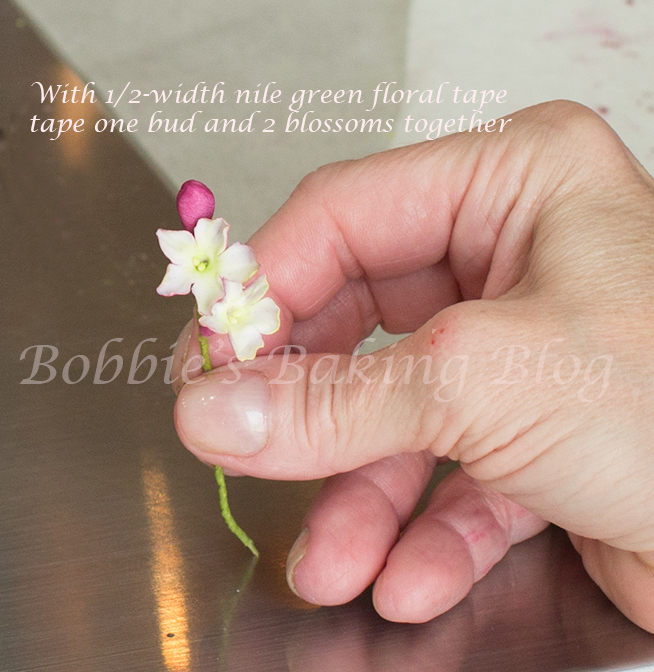
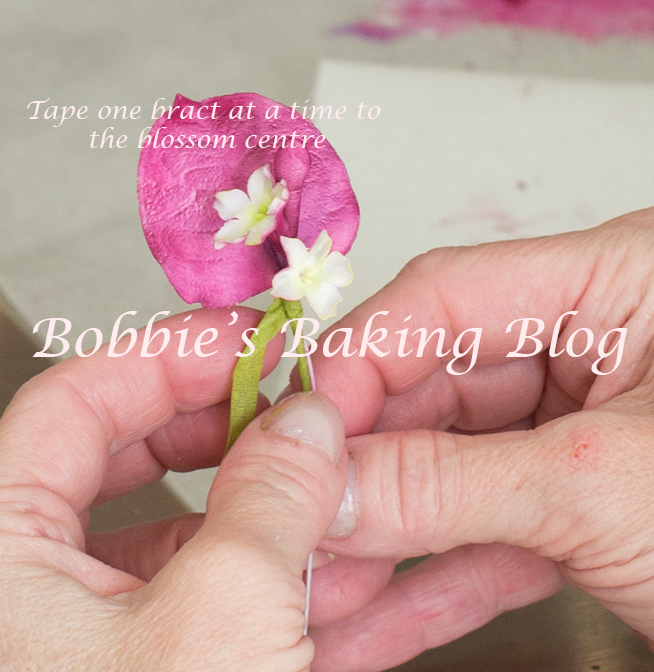
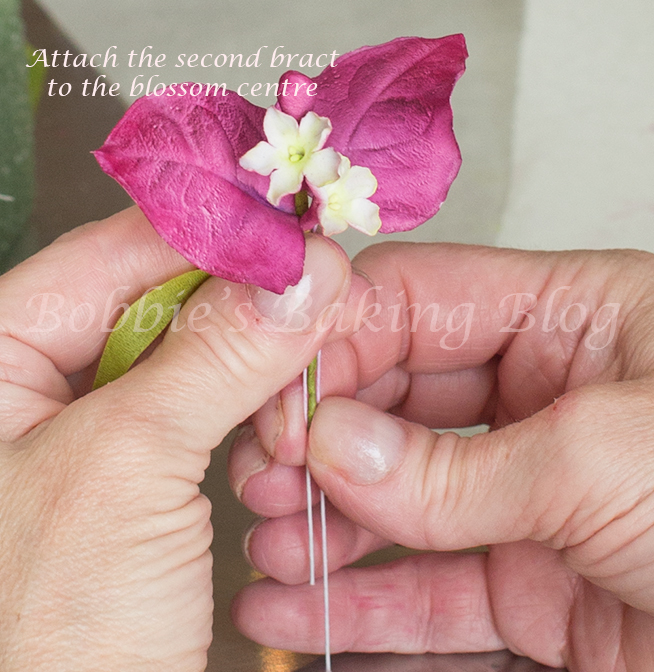
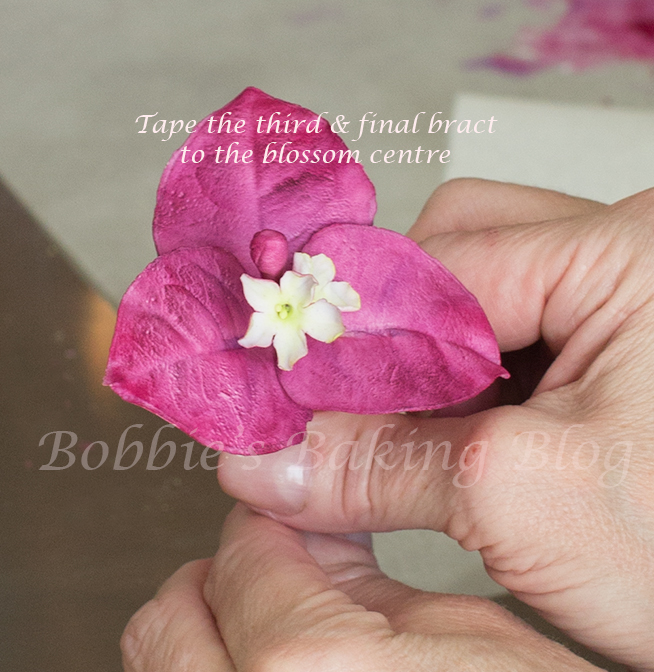
With half width nile green tape, stretch the tape to release the glue and tape the two blossoms to the bud which is the centre. Next tape one bract to the centre, wrap the tape around once. Add the second bract, wrap the tape around once as you stretch the tape, and finish with the third bract. Wrap the tape all the way down the wires gently stretching the tape as you go, and cut the bottom blunt with wire cutters.
Sydney completely loves this Elegant Summer spray and I had an amazing time creating every part of it for her.
I know you will have a brilliant time creating your own Bougainvillea too!
Enjoy!




Bobbie,
I am in awe! Your flowers are gorgeous!! I had to look twice since they look so real. Your work is meticulous and perfected. I hope you only sell to the wealthy because you deserve to be paid top dollar for your creations.
Thanks for recreating nature’s beauties. – Valerie
Thank you Valerie 🙂
your flowers are perfect. I can’t wait to sit down and follow your class here on your site word for word. That’s what I plan to do by the end of the week. WOW it all looks so perfect. thank you for sharing with us.
Thank you Suzie, I would enjoy seeing your work!
Your flowers look so real!
Thank you
Breathtakingly beautiful! That’s where I want to be after many many many hours of practice! 🙂
Thank you!
Thank you for the tutorial. This will help me lot when I am going to do my flower basket with bouganvilla flowers.
Thank you again and keep up with good work. Take care XX
Thank Malani, I would love to see your Bougainvillea flowers!