
The majestic look of butterflies
I seem to find myself in a more relaxed state during the long warm summer months. Sydney and I find time to lay in the sun and catch up on our lives. Although we are blessed to work together with an “occasional” lunch, Sydney’s life is busy with friends and preparing herself to transfer across the country to another university, and I am busy preparing pastry classes and scheduling our clients. The alluring sunshine with summer sounds of a light breeze blowing through the grass and butterflies fluttering on aromatic flowers propels my senses to relax and take a a break.
While Sydney and I were lounging outside watching a butterfly lazily stoping on a flower; I thought how absolutely beautiful, carefree, and majestic they are. Which gave me the idea to decorate lavender flavor cupcakes with butterflies. I couldn’t decide between gum paste and royal icing; Sydney suggested it might be fun to teach you two amazing decorating techniques for 3-d butterflies.

Summer colors are so refreshing.
Lavender Cupcakes mise en place.

Mise en place (substitute the rose essence with lavender essence)
The recipe for these cupcakes are in the link above.
Gumpaste Butterflies:
- 1- recipe cupcakes
- Patchwork butterfly cutters
- Gumpaste, Mexican paste, or fondant mixed with gum tragacanth
- 2 drops rose pink food color paste
- Small rolling pin
- A fondant mat
- Celformers
- Triangle metal spatula
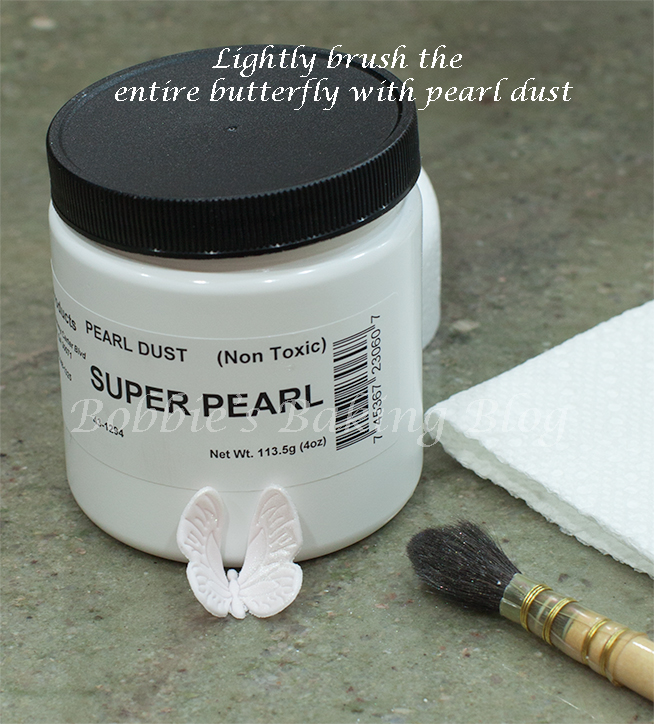
- Pearl luster dust
- Mop brush
- Shortening
Prepare your mise en place.

Gumpaste mise en place
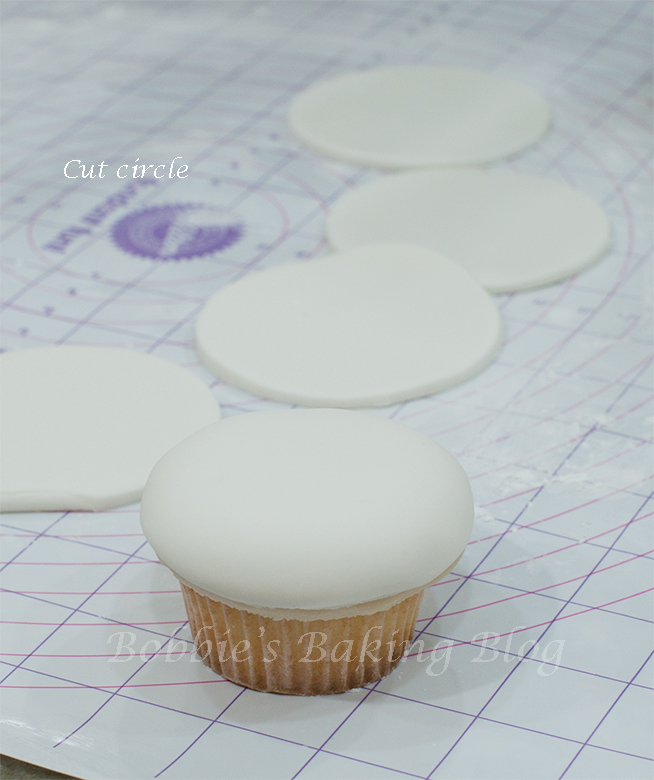
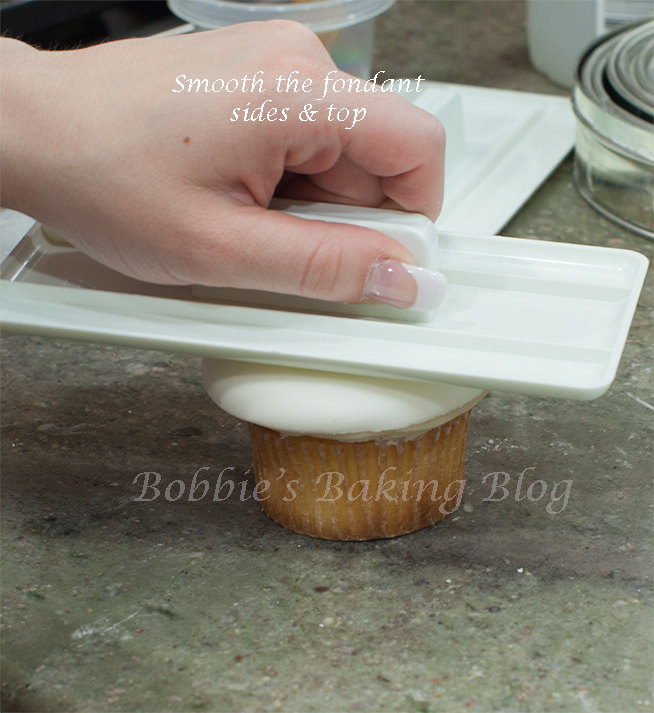
Before we start decorating we need to fondant the cupcakes; similar to the technique of a fondant cake (the link gives step by step instructions). You first need to cover the cupcakes with marzipan. After covering with marzipan and drying overnight fondant the cupcakes. Cut the fondant with a circle cutter one size larger than the cupcake top, smooth with you hands lightly and than completely smooth with smoothers.
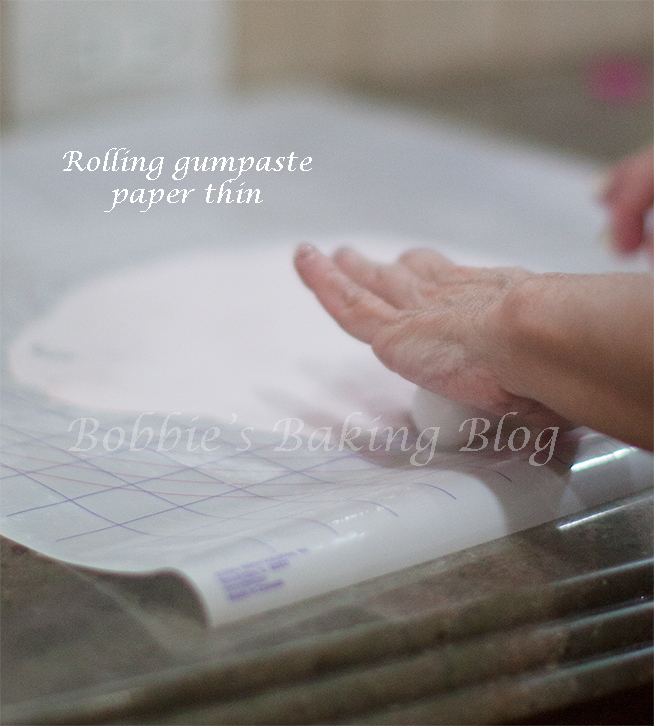
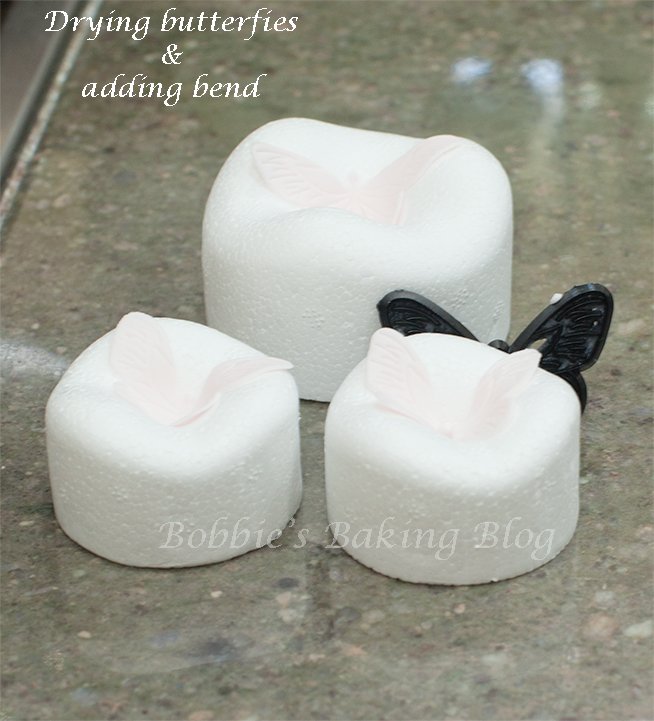
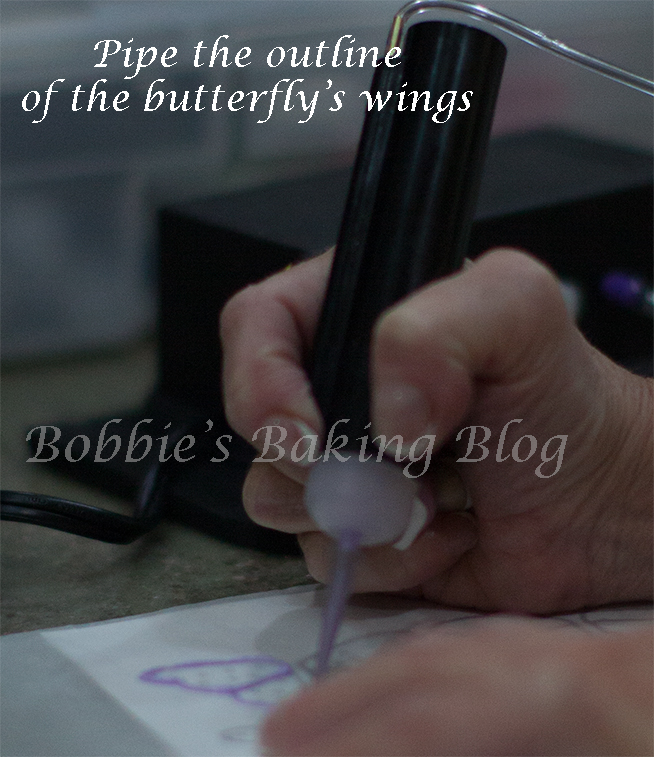
You’ll need about a base ball size of gumpaste , knead it well, add the food paste, and knead until the gum paste is a pale pink, soft,and sticky. Lightly grease your mat with shortening. Begin to roll the gum paste paper thin, spacers are available to assure the gumpaste is evenly rolled out. Using a greased patchwork butterfly or small butterfly cookie cutter, cut out your butterflies, with a mop brush generously brush pearl dust on the butterfly, and cupcake. Gently lift the cut butterfly with a triangle shaped spatula, and place the butterfly in a celformer. If you do not have celformers crumble a square piece of tin foil into a ball with a thumb print indented into the foil, lay a creased piece of film over the tin foil. Place the butterfly on the film. Allow to dry overnight.

Gumpaste butterflies give an elegant look. Perfect for a wedding or a shower!
- Fondant covered cupcakes
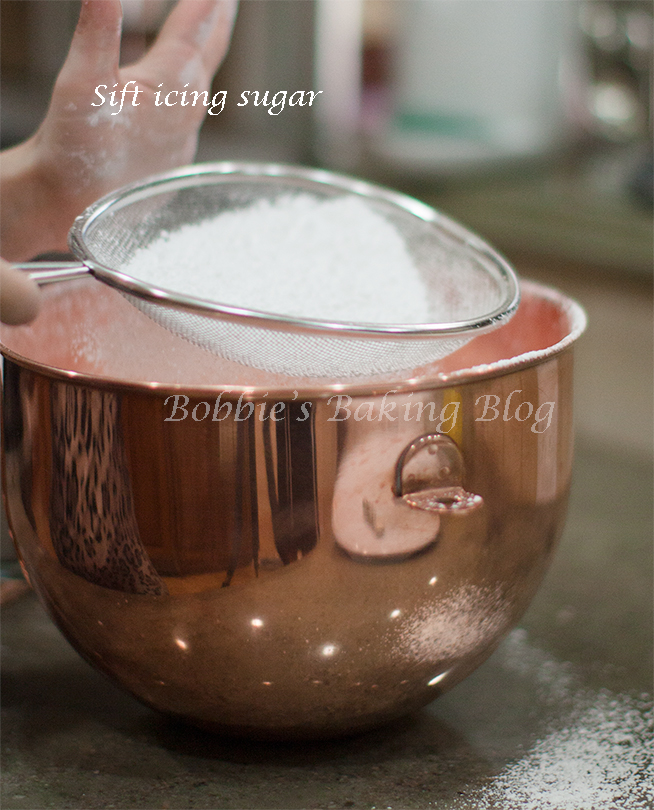
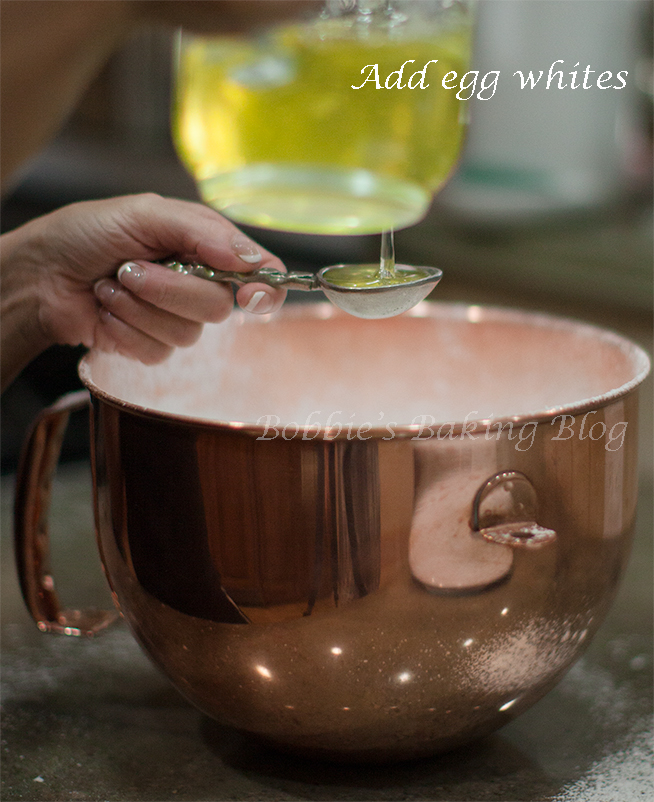
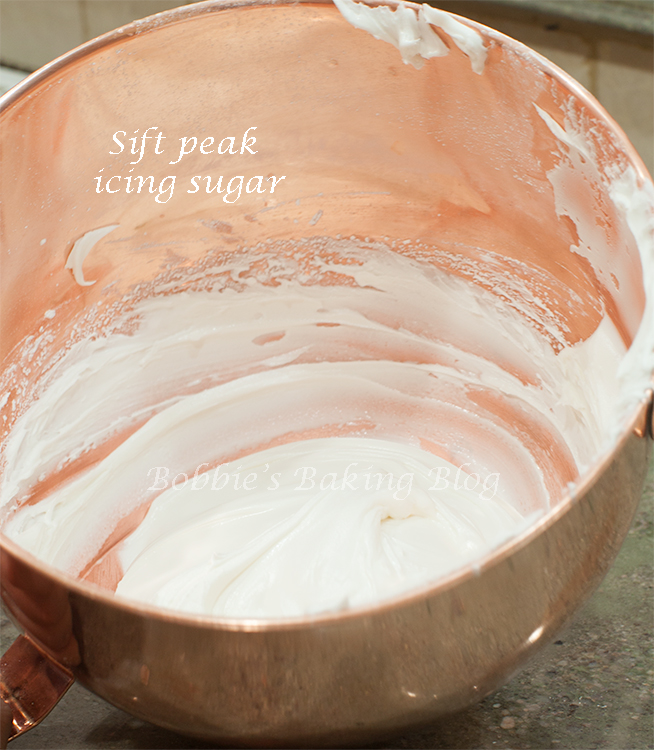
- 1-recipe royal icing
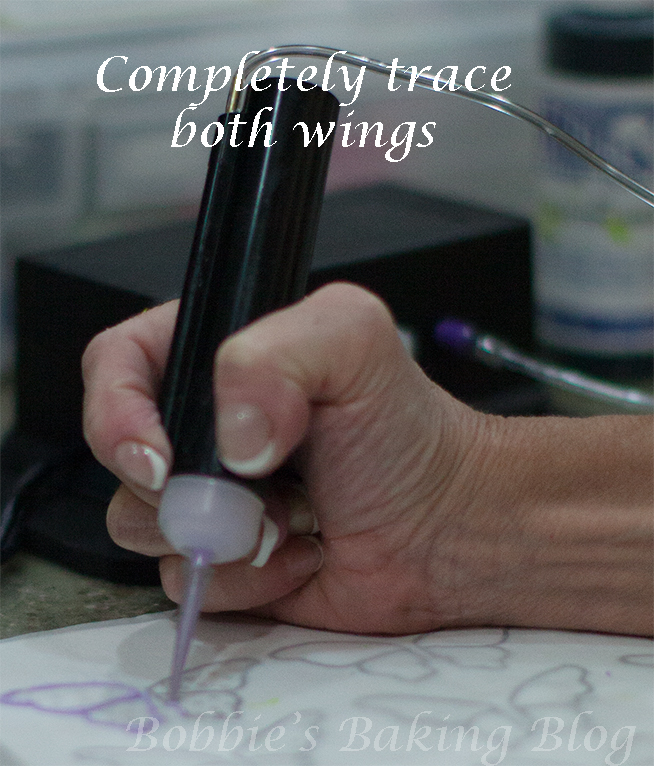
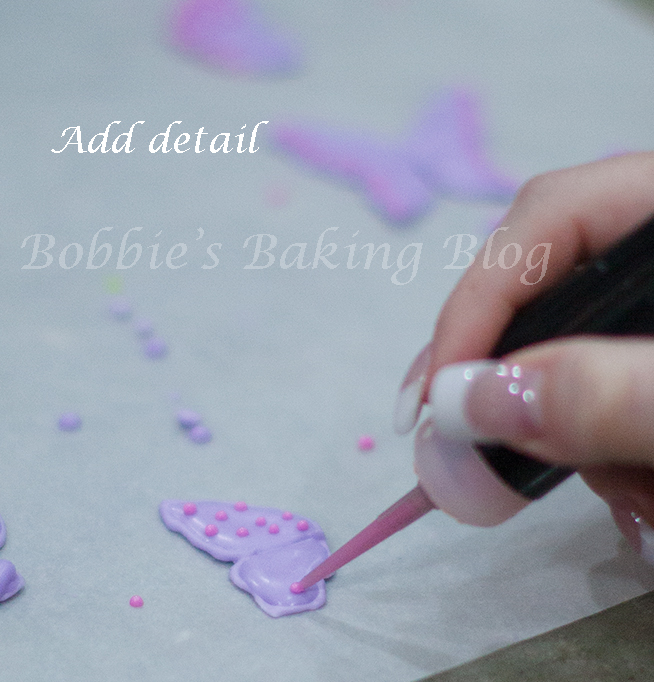
- Airpen or paper cones, one for each color
- 24 index cards folded in half
- Templates of butterflies
- Parchment paper
- Wax paper squares
- Shortening
- Pastel food color paste
- Tooth picks
- Paper towel cut into squares and folded
- Mini spatulas
- Piping gel (optional)

the royal icing butterflies are colorful and fun. Perfect for a birthday party or picnic!
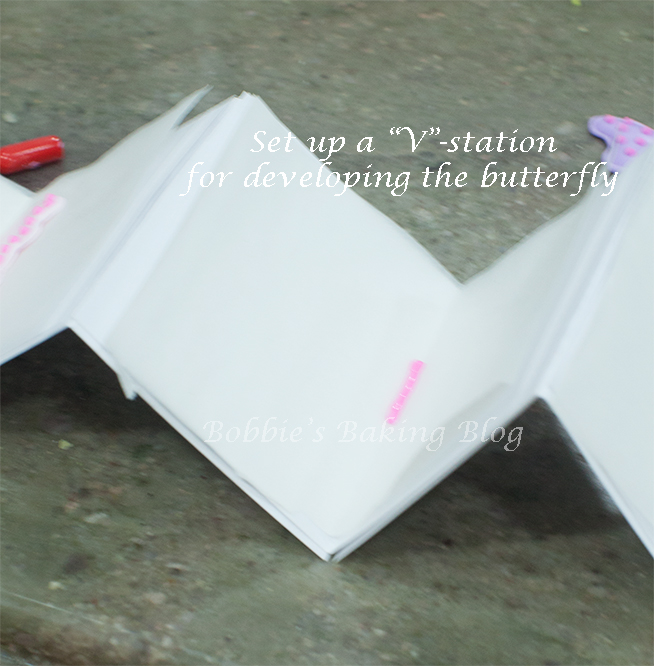
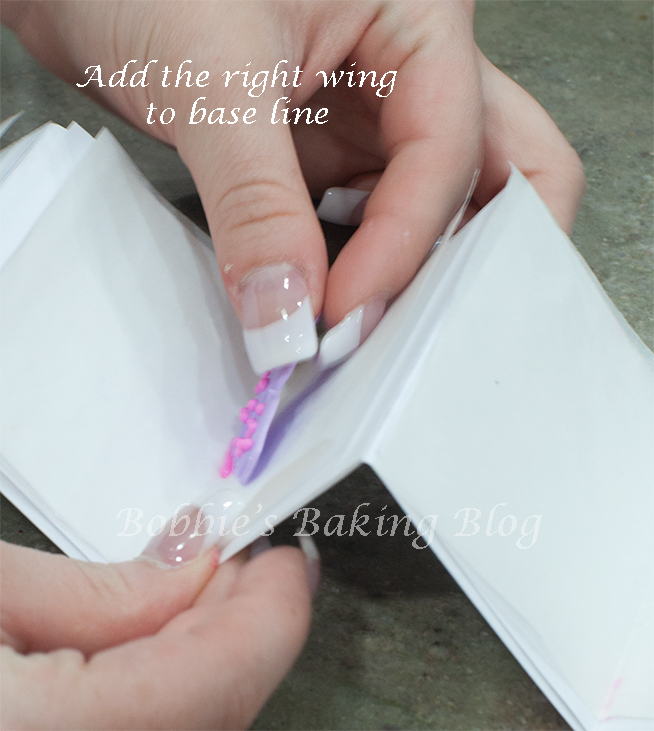
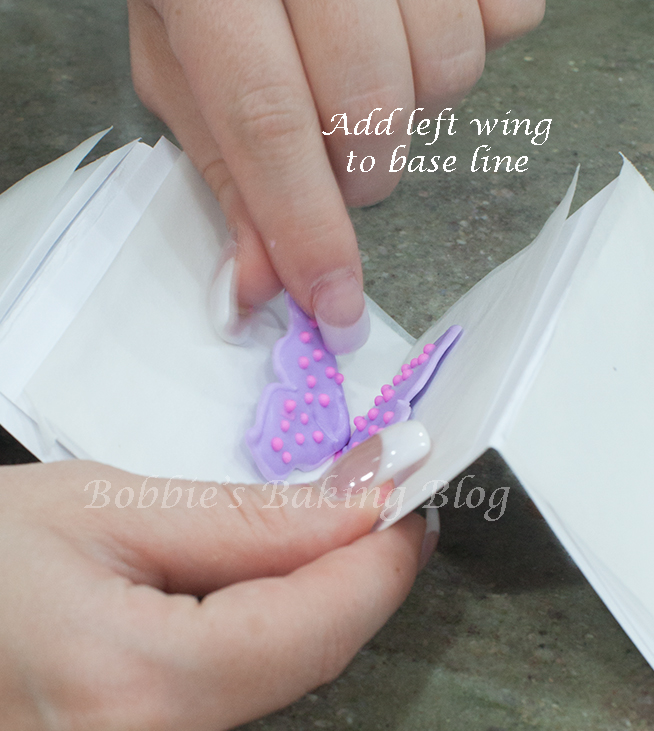
Once the wings have dried completely we can assembly them, add their bodies and antennas. Fold 24 index cards in half ,open the cards to a “v”-shape, place a wax paper square inside every other “V.” Line all the cards in a row with every other “V”-shaped card upright and other cards upside down. The upside down “V”-shaped cards will support the upright card. Pipe a line in the same color you have chosen for the the butterflies body down the middle of the “V”, lay the right wing on the right side of the “V” and the left wing to the left side of the “V”. Let the wing dry for at least 4 hours (the line you have just piped is the only support holding the wings together).
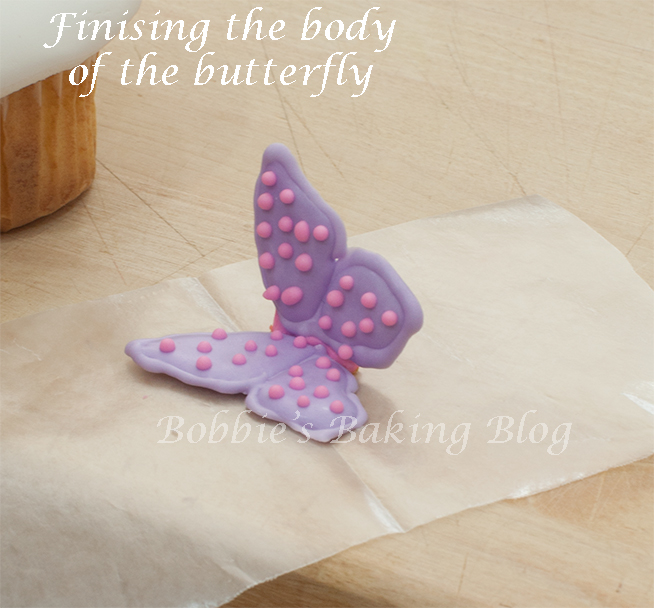
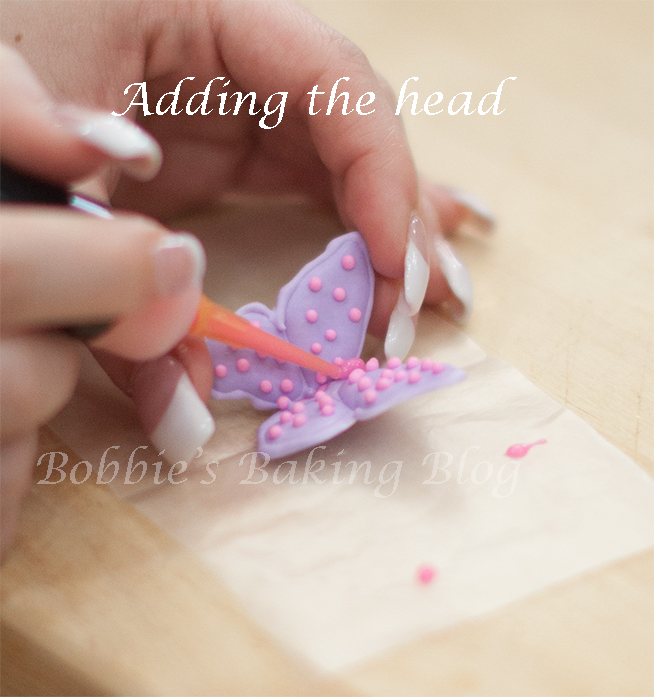
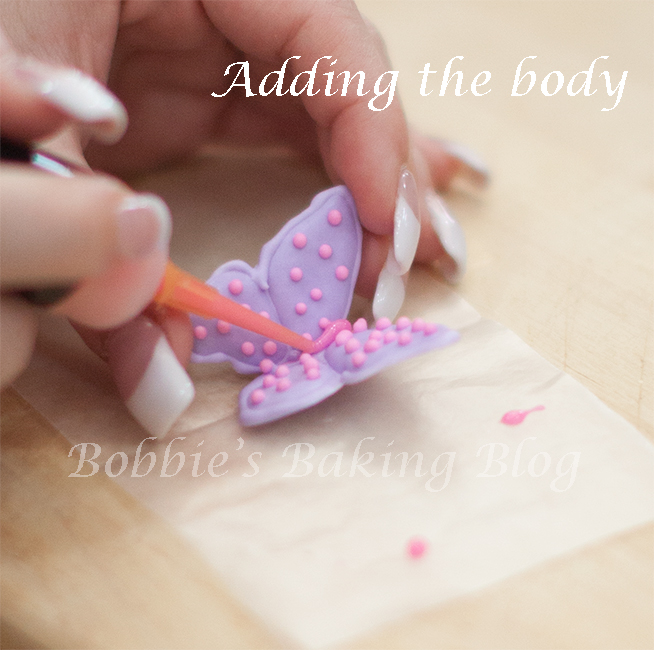
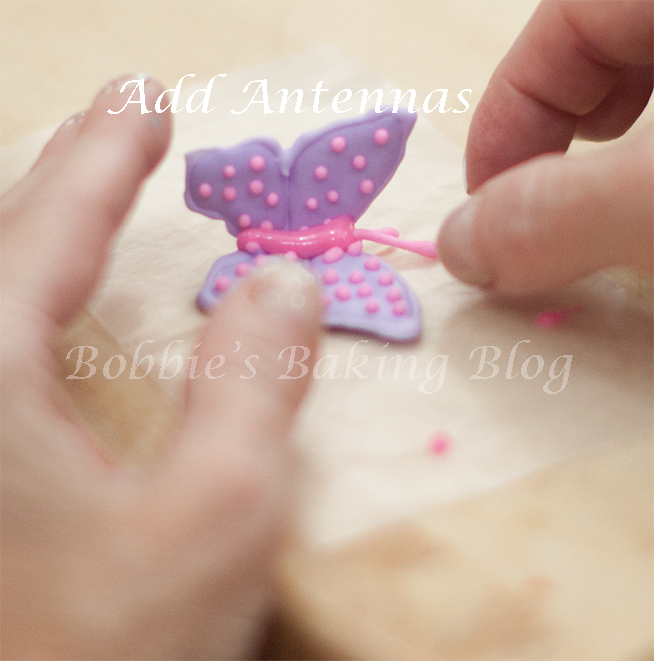
When the wings are securely attached you add the body. Pipe a ball for the head and with a back and forth motion pipe the body (visualize a caterpillar’s body). Attach 2 antennas to the head. Wait until all 12 butterflies are assembled, place 3 balls of stiff royal icing to the back of the butterflies, matching the color of the body, place the butterfly on your cupcake. Clear piping gel works well too, however be careful not to add too much or it will begin to dissolve the royal icing.
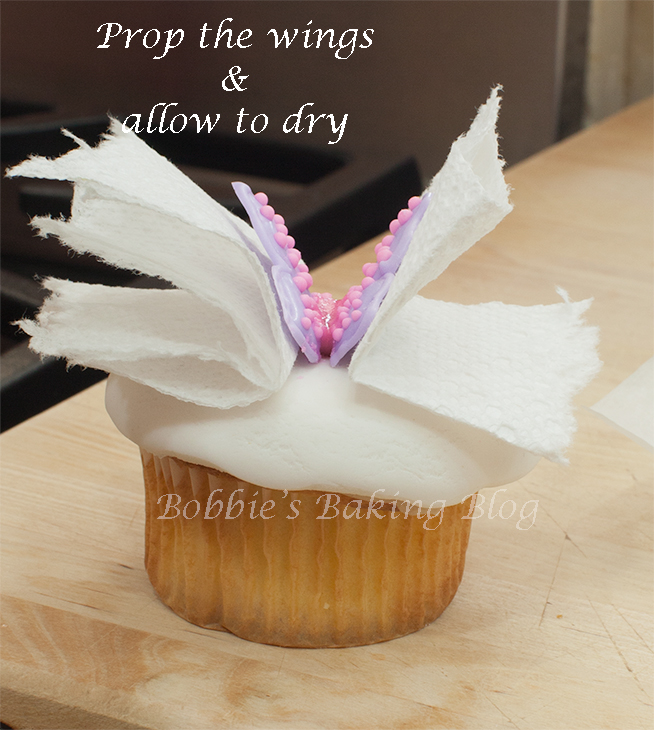
With a small square of folded paper towel prop each wing, the paper towels may be removed once the butterfly is securely adhered to the cupcake. Allow a few hours to dry before removing the paper towels.

Both techniques are equally fun!
Enjoy!

Voila!


Pure talent!! What a fabulous idea for cupcakes!
What a delightful way of presenting your photos and instructions1 I have been trying to think of a way to help clarify mine and I might use a similar technique if you wouldn’t mind.
What a wonderful compliment; have a sweet day!
Thank you, we were most definitely in a convivial mood during our baking time!
I love the bright colors. Your butterflies are so pretty thanks for sharing this lesson.
Your welcome..If you prepare the cupcakes I would enjoy seeing a photo!
Hey Bobbiesbakingblog,
Speaking of which, Just for me and my 3 friends
e.g
1.Publish newletter
2.Write E-letters to each other
Any other good ideas for me and my 3 friends?
Catch you again soon!