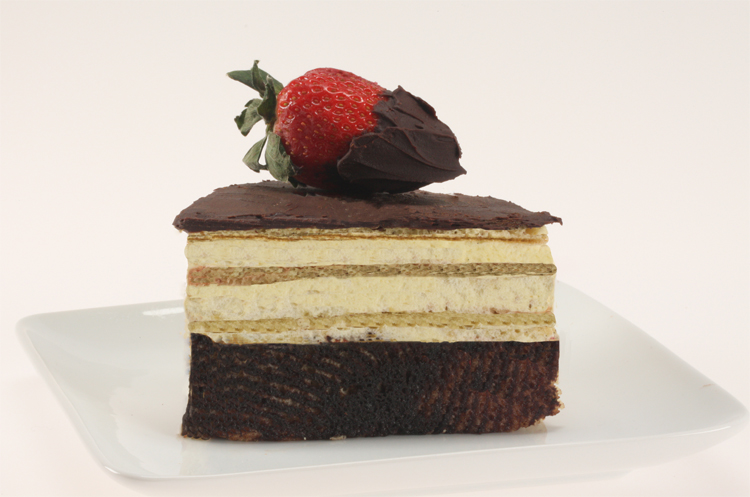
 Tulip Paste Triangle Shape Gàteau
Before I begin I need to thank Sydney, not only could I have not been able to complete the cakes without her help, but she starts spring term next week and is organizing all her supplies and college necessities, so her time is precious. During the entire two days we were creating these elaborate cakes, all three of them, unbeknownst to me, she was by my side with a broken rib. Not once did she complain or take a break. It was not until late the next evening she announced it was uncomfortable for her to exhale. Panic set in, ammonia or perhaps pleurisy (I tend to go to the extreme). Just as I am calling our family doctor she showed me her left side by her ribcage, I had broken my rib this past march while we were in France, so I knew what a broken rib looked like. I felt like the worst mom in the world, I was so involved in baking I did not realize Sydney was in pain. That is why she is my “green bean.”
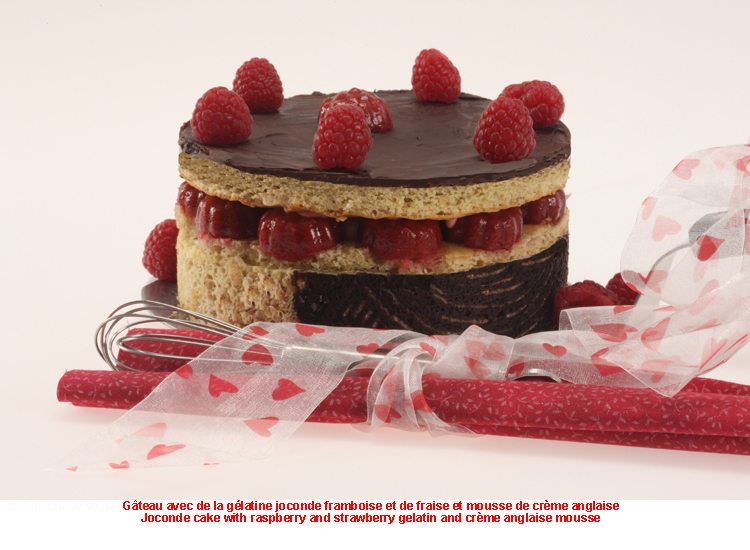 January tends to be a melancholy month for our family. The holidays have ended, the days become shorter and colder; this year I decided to brighten the month up with pastries. We started with a special cake for New Years Eve and continue filling the rest of month with mouth watering delights, no I have not forgotten Valentine’s day, however that holiday is in February.
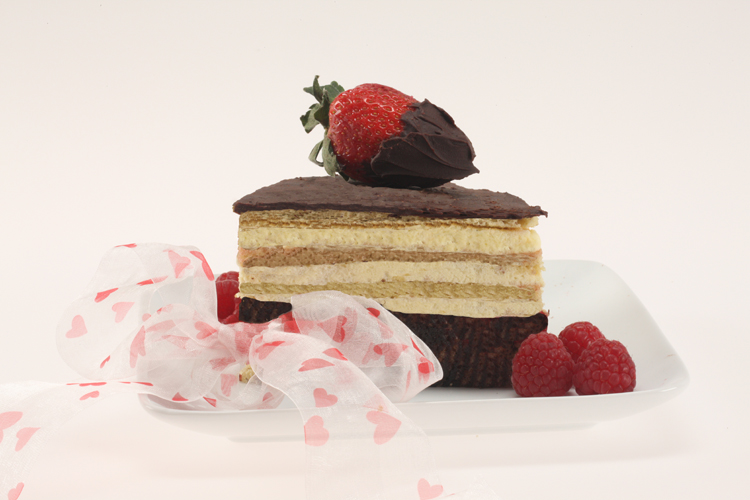
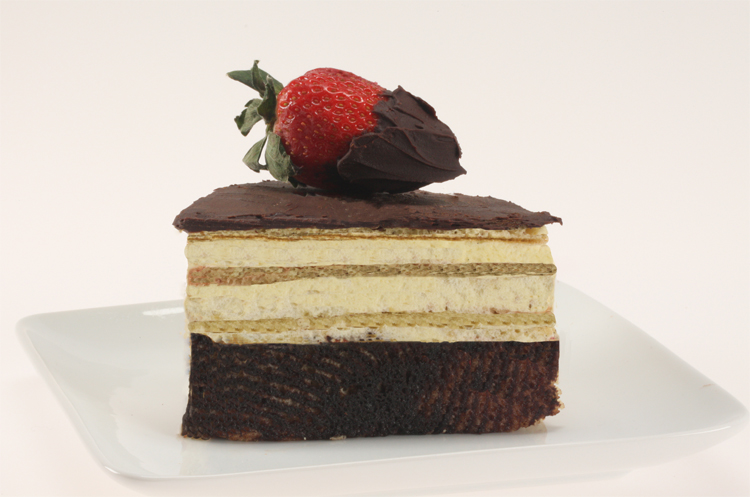
After much thinking of what to bake this week, Chocolate joconde paste (also refereed as a tulip paste) gâteau with raspberry and strawberry coulis gelatin and crème anglaise mousse seemed cheerfully appropriate for this time of year.
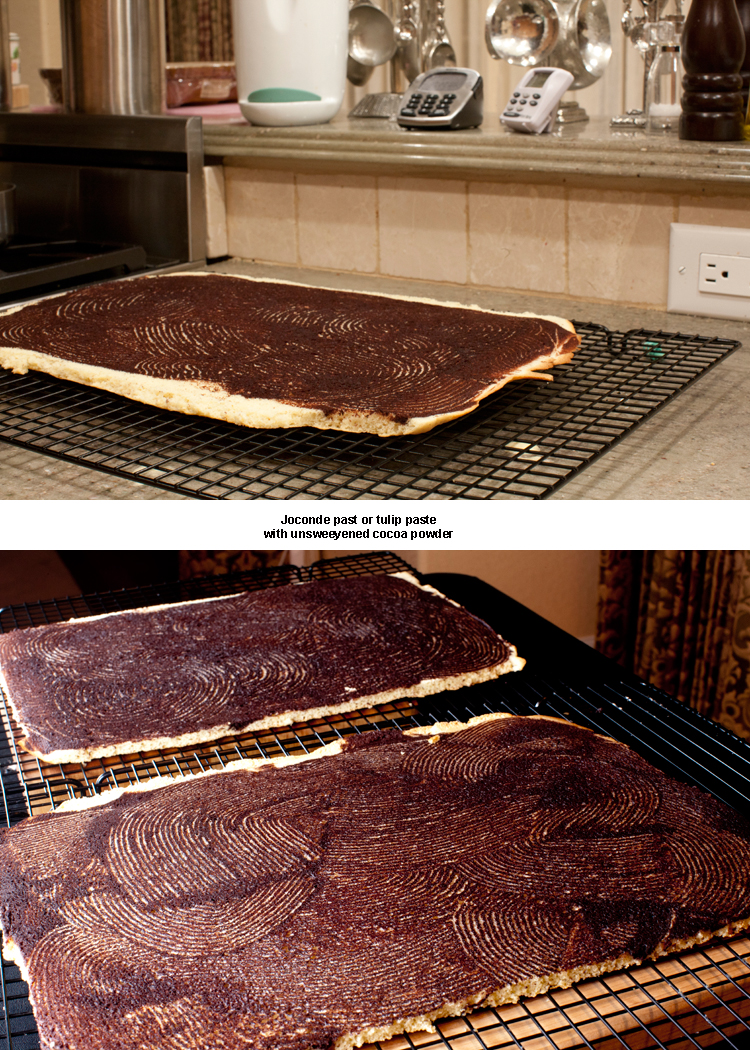 I used a pastry comb for this pattern
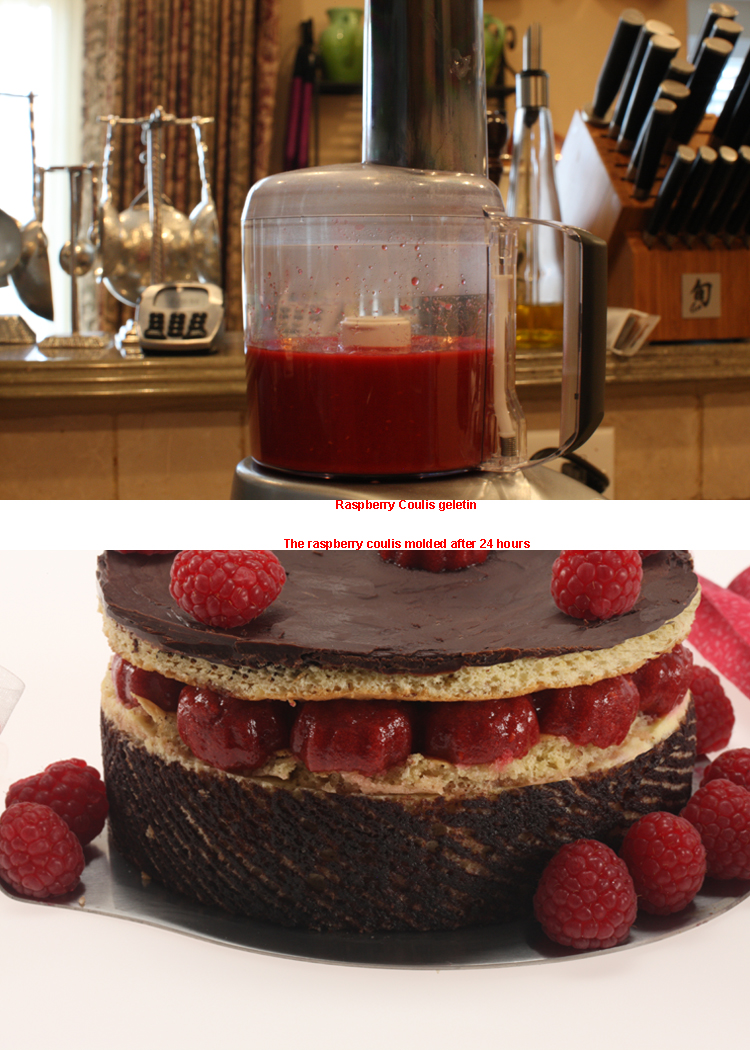
We decided to have two flavored coulis for this Joconde, raspberry and strawberry. I had purchased a mini raspberry shaped mold and thought it would be special to pour the raspberry coulis gelatin into the molds. I unfortunately did not have a strawberry shaped mold, so I laid a silpat into a 33×23 cm/ 13x 9 inch baking pan, and poured the strawberry coulis gelatin into the baking pan. This step is quite easy, however for the best result the gelatin should go into the freezer over night.
 The layer between the top and the start of the Joconde Paste
During the coulis’ overnight stay in the freezer we had time to work on a filling, first bouncing ideas off one another, which led to a conversation about Crème brûlée. I now knew what filling would be prefect..Crème Anglaise…with a twist. I added fragoli (a strawberry liqueur), gelatin sheets, and folded it into whipped cream.
It was Sydney’s idea to try different shapes, at first I was not as sure about the triangle. After some trial and error with a large triangle scone cutter, we finally hit a ‘”eureka” moment. The cutter was too shallow, in order to give it some height I used strips of wax paper about 3.8 cm/ 1.5-inches higher than the top of the cutter. This way the cake would be perfectly molded from top to bottom.
Gâteau aux Noisettes Hiver:
Chocolate Joconde Paste:
113 grams/ 7/8-cup icing sugar, sifted
113 grams/1/2 -cup butter, softened
100 grams/ about 3 large egg whites
70 grams/ 2/3-cup cake flour, sifted
42 grams/1/2-cup cocoa powder unsweetened, sifted
This recipe makes 2- 1/2 sheet jellyroll pans.
Line 2 jellyroll pans with silpat and set aside.
Cream the butter for about 1 minute in a standing mixer with the paddle attachment, then sift the icing sugar into the butter and cream until smooth (no lumps). Remove the bowl from the standing mixer whisk by hand with a balloon whisk the egg whites one at a time (if you put the egg white liquid in a measuring jug it easier to control), now add the flour in 2 batches and the cocoa powder. Continue whisking until a paste texture forms and all the color is evenly distributed.
With an offset spatula spread a thin even layer of paste, making sure to cover the entire silpat. Here is where pretty much your artistic person has car blanche; you can use a stencil, free form a design with a knife, or I used a fondant mat placed in the freezer, used a sharp blade to cut the pattern, and placed the paste back into the freezer. Place the decorated Joconde paste in the freezer for about 2 hours.
Joconde:
165 grams/5 large egg whites, at room temperature
30 grams/ 2 tablespoons granulated sugar
100 grams/ 2-cups ground blanched almonds or hazelnut
100 grams hazelnut flour
200 grams/17/8-cups icing sugar, sifted
60 grams/3 large egg yolks
250 grams/5 eggs
78 grams/ ¾cup cake flour
28-grams/ 2-Tablespoons clarified beurre noisette
28 grams/ 2-Tablespoons melted butter
Preheat the oven to 218ºC/ 425◦F. Line two 15½ by 12½ inch sheet pans (½ sheet jelly roll pans) with parchment paper and brush with melted butter.
Using a food processor fitted with a metal chopping blade, process the almonds and hazelnuts to a very fine cornmeal-like texture.In a bowl of your standing mixer with the paddle attachment, on low speed mix the almond/hazelnut flour, icing sugar, and cake flour, just until combined. Increase the mixer to medium-low speed, beat 1 egg at a time making sure each egg is beaten for a couple minutes, occasionally scraping down the sides of the bowl. It is imperative that each egg is added and beaten for a couple of minutes. Once all six eggs are incorporated continue to beat, on medium speed for 4 minute insuring that as much air as possible has been incorporated. The mixture should be pale yellow in color and voluminous. Set the batter aside, or if you do not have another mixer bowl scrape the batter into a different bowl.
In a very clean bowl of your standing mixer fitted with the whisk attachment beat the egg whites and egg white powder on medium speed to aerate. When the egg whites begin to form soft peaks slowly add the granulated sugar and whisk until the peaks are stiff and glossy. Keep a careful eye on the egg whites they can very quickly turn from satin shiny glossy peaks to gloomy dry and an over mixed nightmare. (If this happens don’t panic, however you will need to repeat the process with six more egg whites).
Using a rubber spatula, gently fold the meringue into the almond/hazelnut mixture, in two batches. Take about ½ cup of the batter and fold into the melted butter, this method keeps the butter from falling to the bottom of the bowl, and then fold the melted butter back into the batter (making sure it is completely incorporated into the batter).
Carefully pour the batter equally into the prepared pans, smoothing it into an even layer. DO NOT press down or the batter will loose volume and the cake will be tough.
Bake the cake layers until they are lightly browned and just springy to the touch, about 5 to 8 minutes (every oven is different so keep a close eye on it). Remove from the oven and invert the cake onto a cool sheet pan or a wire rack, peel off the parchment paper and cool completely. Using a sharp serrated knife cut the cake.
Syrup:
Fragolli Sugar Syrup:
119 grams/ 1/3 -cup water
100 grams/ ½ -cup sugar
¼-cup fragolli
Bring the sugar and water to a boil in a heavy bottom saucepan; cook till the sugar is dissolved. Pour the syrup into a glass-measuring jug and add Framboise when the syrup has cooled. Brush each layer of the cake with the Framboise syrup.
For the Raspberry Syrup:
Look at Gâteaux aux Framboises: Raspberry Gâteau.
Strawberry Coulis Jellified:
Prepare 33×23 cm/ 13x 9 inch baking pan with a silpat and set aside.
500 grams/ 2 1/8-cup fresh strawberries
100 grams/½-cup granulated sugar
59 grams/¼-cup water
1-cup (12 ounces) seedless strawberry preserves
20 grams/7 sheets gold gelatine leaves
1½-Tablespoon fragolli liqueur
Place ½ the strawberries, the granulated sugar, and ¼ -cup water in a small saucepan. Bring to a boil, lower the heat, and simmer for 5 minutes. In the meantime, soften the gelatine sheets in very cold water for 5 minutes, then ring the excess water off and add the gelatine into the hot strawberries and stir.
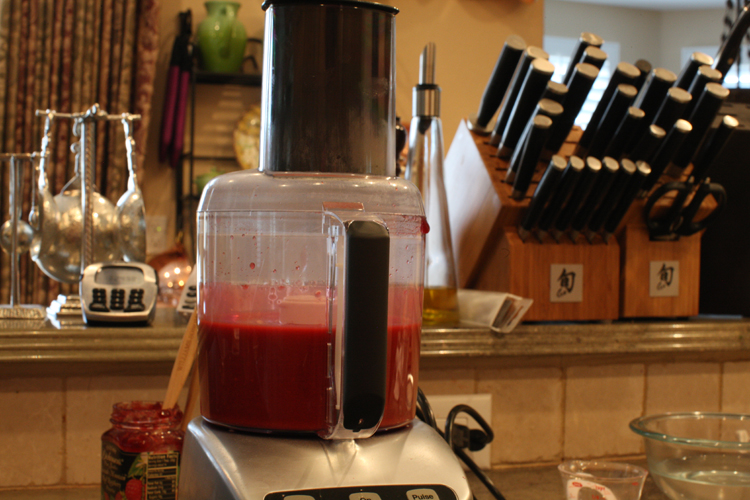
Pour the cooked strawberries gelatine, fresh strawberriess, the jam, and Fragolli into the bowl of a food processor fitted with the steel blade and process until smooth.
Pour the coulis on the silpat and spread with a metal spatula in 1/4 thick and place in the freezer till set.
Raspberry Coulis Jellified:
Prepare a jellyroll pan with a silpat and set aside.
500 grams/ 2 1/8-cup fresh raspberries
100 grams/½-cup granulated sugar
59 grams/¼-cup water
1-cup (12 ounces) seedless raspberry jam
20 grams/5 sheets gold gelatine leaves
1½-Tablespoon Framboise liqueur
Place 1/2 of raspberries, the granulated sugar, and ¼ -cup water in a small saucepan. Bring to a boil, lower the heat, and simmer for 5 minutes.In the meantime, soften the gelatine sheets in very cold water for 5 minutes, then ring the excess water off and add the gelatine into the hot raspberries and stir.
Pour the cooked raspberries gelatine, the rest of fresh raspberries, the jam, and Framboise into the bowl of a food processor fitted with the steel blade and process until smooth.
Pour the coulis into raspberry molds or on the silpat and spread with a metal spatula in 1/4 thick and place in the freezer till set.
Strawberry and Vanilla Crème Anglaise Mousse:
560 grams/ 2 1/3 cup half & half
170 grams/ ¾ -cup Mascarpone Cheese
168/6-7 egg yolk
170 grams super fine sugar
Pinch of salt
2 ½ -teaspoon Fragoli
46 grams powder sugar
1 vanilla bean,
20 grams/7 sheets gelatin, gold strength (L’ epicerie)
440 grams heavy cream, cold
Place the bowl of a standing mixer along with the whisk attachment in the freezer ½ hour before preparing the filling.
Heat mascarpone half and half, and a vanilla bean in a heavy-bottom saucepan bring to a ”kiss” of a simmer.
While the crème mixture is heating place the gelatin sheets into very cold water, and with a hand mixer beat egg yolks and sugar, in a bowl, preferably copper, till ribbons form and the egg mixture turns pale yellow.
In a steady stream, pour ½ of the hot crème over egg mixture, stirring with the whisk continuously. (Do not beat to minimizing foaming). Be sure to scrape the yolks from the sides and bottom of the bowl and stir until thoroughly blended. Pour the egg crème mixture back into the pan. Using a wooden spoon in place of the whisk, stir continuously until you can see clearing the sides and bottom of the pan. As the sauce heats do not let it boil when it becomes thick test the mixture: when it coats the spoon well, a trail will remain when you draw your finger across it, and registers 74 degreesC/165 degrees F. Immediately remove from the heat and pour the sauce through a sieve into a bowl set and allow to cool. Stir in the gelatin sheets (after ringing out the excesses water), fragoli, and add vanilla seed from the pod (that is left in the sieve).
While the Crème Anglaise is cooling whip the heavy cream and powder sugar to soft peaks in a standing mixer with the whisk attachment on medium speed. Turn mixer down to low and slowly pour the Crème Anglaise into the whipped cream.
Bittersweet Chocolate Glaze:
250 grams /8.82 ounces
55 grams/ 3-tablespoon heavy cream
20 grams/ 1-teaspoon corn syrup
Melt the dark chocolate with the heavy cream. Whisk gently until smooth. Let cool for 10 minutes and then pour over the chilled cakes.
Assembly:
You will need a sharp knife, the frozen jellied raspberries and strawberries, crème anglaise mousse, a pastry brush, the prepared Joconde paste, Joconde cakes, a long ruler and either a mold, cake ring, or large scone cutter.
Now take a minute to visualize what you want your gâteau to look like. I know this sounds tedious, however as Sydney constantly reminds me if we can’t visualize the finished product mistakes will be made.
Prepare your mise en plalce.
There several ways to assemble the Gâteau, depending on the shape and size you choose, the sky is the limit. Choose a shape or mold, line a jelly roll pan with parchment paper (to place the cutters,mold, or rings on). With your ruler decide how thick and long you want the Joconde/tulip paste to be. Once a shape has been decided pre cut the Joconde to the proper size.
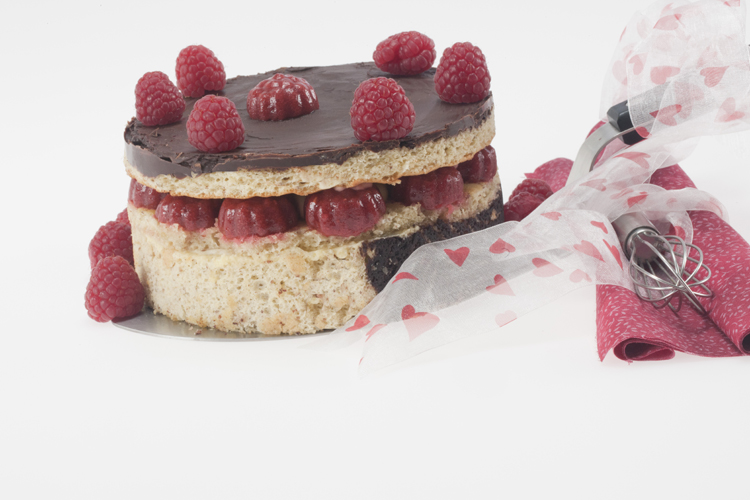 On this Gâteau/cake the Joconde paste only goes around half way.
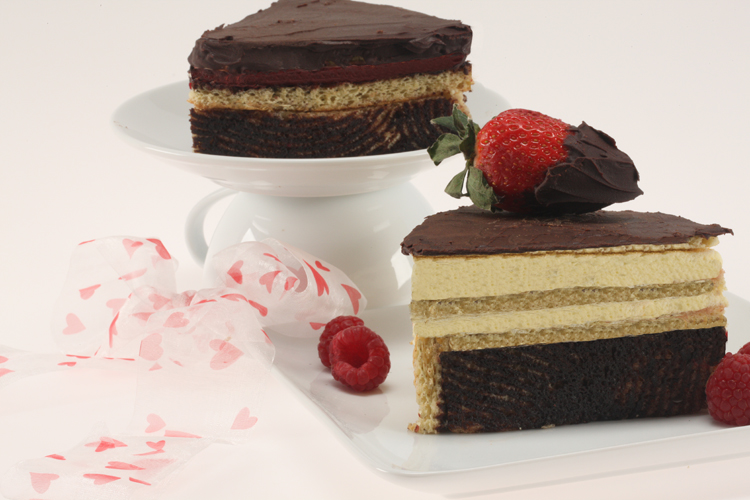 On one of these triangles the Joconde paste was 2.5cm/1-inch thick & the other the paste is 6 cmm thick.
Once you have the Joconde/tulip paste cut to the dimension you want carefully place the paste around the inside of the mold, layer with Joconde, using a pastry brush, generously soak the cake with the framboise or fragoli syrup, spread crème anglaise over the biscuit, layer with either the jellfied raspberry or strawberry, place another biscuit. Continue this method till you have at least 4 layers of Joconde biscuit.
Leave the finished Gâteaux in there mold, cutters, rings or sheet, place in the refrigerator for several hours to over night to set. Once the Gateaux has set use a long metal cake spatula, smooth out an even layer of prepared dark chocolate glaze. Place the cake back into the refrigerator to set.

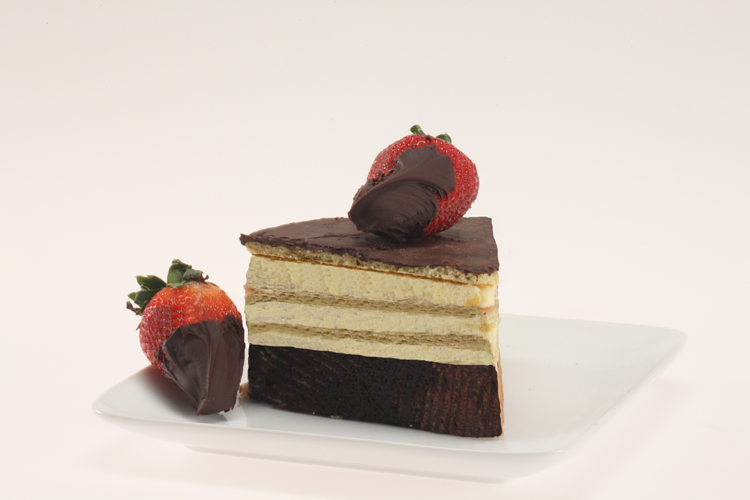
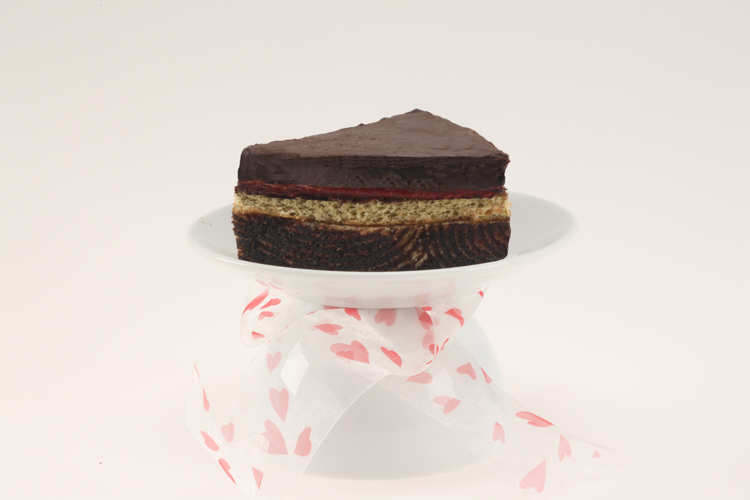


That looks absolutely divine… must… have… a …. sliiiiice.
You definitely know your pastries, I have spent the better part of the day on your blog. You are one in a million, a great writer, an award winning pastry chef, and just about the best blogger out there! Keep up the wonderful work!
Great blog, Just wanted to comment that i can not connect to the rss stream, you might want install the right wordpress plugin for that to workthat.
I was recommended this website, I can’t believe I hadn’t been here before . You’re wonderful! Thanks!
I like this web blog so much, saved to my bookmarks .
i’d love to share this posting with the readers on my site. thanks for sharing!
You guys must invest alot of time working on this blog. im impressed
Nice work! keep the posts coming! Thanks
WOW. I mean, just, WOW. That looks awesome. That sounds awesome. Those layers are AMAZING – straight, neat, and SO tasty looking and sounding.
It looks scrumptiously pretty
You really know your stuff. Keep up the good work!
Im thankful for the blog article.Thanks Again. Great.
What a great blog and delicious post
Been looking for a great recipe that works well. Thank you alot 🙂
Beautiful! You really have are a gifted pâtissier.The flavors of the cake are exquisite !
Elegant, beautiful, and exquisite!
thanks for you admin.
We most usually don’t write on Blogs however your blog forced me to, great writing style…. just unbelievable!! the pastries are amazing. Your Blog is the most favorable I have read to this date. Keep it up.
would you please post more info on this, I would like a little more info, thanx
Enjoyed every bit of your article post.Really thank you! Fantastic.
Very nice article and straight to the point. I am not sure if this is actually the best place to ask but would you consider writing professional articles Thx 🙂
I’m truly enjoying the design and layout of your website. It’s a very easy on the eyes which makes it much more enjoyable for me to come here and visit more often. Did you hire out a designer to create your theme? Fantastic work!
I just realized your the author of the culinary calculator apple app, I couldn’t bake without it ingenious
Pretty nice post. I just stumbled upon your blog and wished to say that I’ve truly enjoyed browsing your blog posts. After all I’ll be subscribing to your feed and I hope you write again very soon!
Glad to be one of many visitors on this awesome web site
WOW WHAT A CAKE!!
Great article and blog and we want more!
This is one of the best baking blog love your article on askmissa.
Hi! I found your article on blogcritics http://blogcritics.org/tastes/article/the-sweetest-morning-breakfast-brioche/ you are a very well educated baker!
I would be very happy to order this in any restaurant –
I read your web post at https://bobbiesbakingblog.com/2011/01/valentines-day-cakejocondeentremets-dessert.. just saying hi, good blog post.
Great post!
Exceptional posting and genuinely aids with comprehending the subject better.
Have you ever thought about writing an ebook or guest authoring on other blogs? I have a blog based on the same topics you discuss and would really like to have you share some stories/information. I know my viewers would value your work. If you are even remotely interested, feel free to send me an e-mail.
Regards for this post, I am a big fan of this site would like to go on updated.
WONDERFUL Post.thanks for share..more wait ..
Thanks for the article, well written and very informative, Cheers